
6.4: Command-line Testing
- Page ID
- 15308

As described in Section 1.8, it’s more effective to program and debug your code little by little than to attempt writing everything all at once. And after you’ve completed programming an algorithm, it’s important to test that it works correctly on a variety of inputs.
Throughout the book, we illustrate techniques for testing your programs. Most if not all testing is based on a simple idea: does the program do what we expect it to do? For simple programs, it’s not difficult to run them several times and see what happens. But at some point, you will get tired of typing the same test cases over and over.
We can automate the process of entering input and comparing “expected output” with “actual output” using the command line. The basic idea is to store the test cases in plain text files and trick Java into thinking they are coming from the keyboard. Here are step-by-step instructions:
- Make sure you can compile and run the
Convert.javaexample in thech03directory ofThinkJavaCode. - In the same directory as
Convert.java, create a plain text file namedtest.in(“in” is for input). Enter the following line and save the file:193.04
- Create a second plain text file named
test.exp(“exp” is for expected). Enter the following line and save the file:193.04 cm = 6 ft, 4 in
- Open a terminal, and change to the directory with these files. Run the following command to test the program:
java Convert < test.in > test.out
On the command line, < and > are redirection operators. The first one redirects the contents of test.in to System.in, as if it were entered from the keyboard. The second one redirects the contents of System.out to a new file test.out, much like a screen capture. In other words, the test.out file contains the output of your program.
By the way, it’s perfectly okay to compile your programs in DrJava (or some other environment) and run them from the command line. Knowing both techniques allows you to use the right tool for the job.
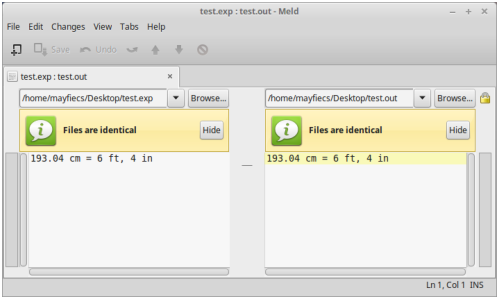
meld to compare expected output with the actual output.At this point, we just need to compare the contents test.out with test.exp. If the files are the same, then the program outputted what we expected it to output. If not, then we found a bug, and we can use the output to begin debugging our program. Fortunately, there’s a simple way to compare files on the command line:
diff test.exp test.out
The diff utility summarizes the differences between two files. If there are no differences, then it displays nothing, which in our case is what we want. If the expected output differs from the actual output, then we need to continue debugging. Usually the program is at fault, and diff provides some insight about what is broken. But there’s also a chance that we have a correct program and the expected output is wrong.
Interpreting the results from diff can be confusing, but fortunately there are many graphical tools that show the differences between two files. For example, on Windows you can install WinMerge, on Mac you can use opendiff (which comes with Xcode), and on Linux there’s meld, shown in Figure 15.4.1.
Regardless of what tool you use, the goal is the same. Debug your program until the actual output is identical to the expected output.