
1.5: Keyboard Shortcuts
- Page ID
- 36340

If you want to evaluate an expression, you do not always have to bring up the yellow-button menu. Instead, you can use keyboard shortcuts.
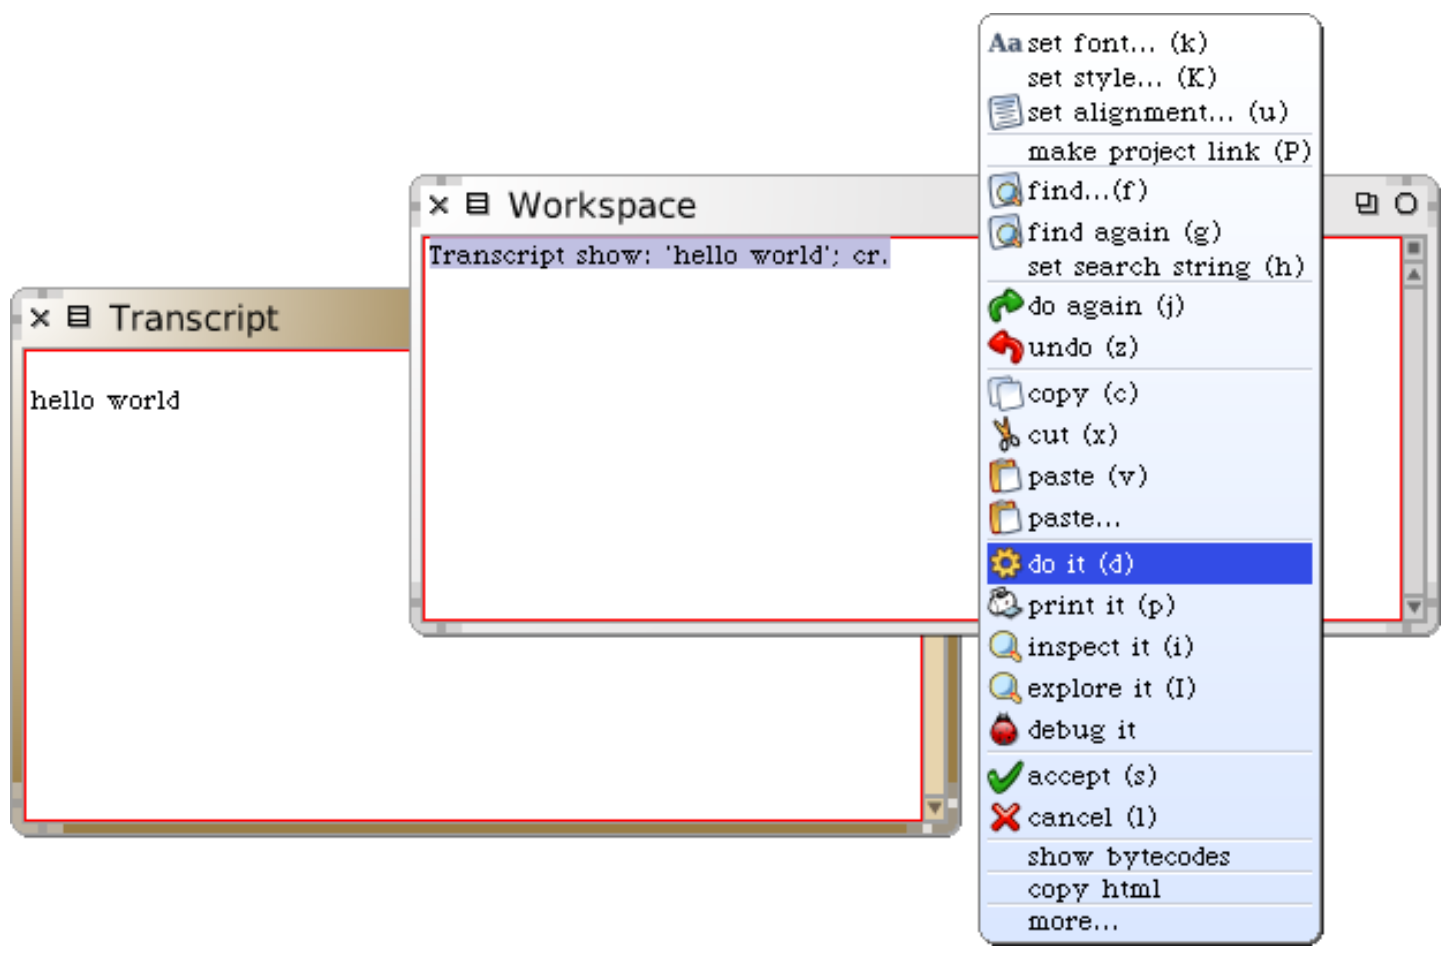
These are the parenthesized expressions in the menu. Depending on your platform, you may have to press one of the modifier keys (control, alt, command, or meta). (We will indicate these generically as CMD–key.)
\(\bigstar\) Evaluate the expression in the workspace again, but using the keyboard shortcut: CMD–d.
In addition to do it, you will have noticed print it, inspect it and explore it. Let’s have a quick look at each of these.
\(\bigstar\) Type the expression 3 + 4 into the workspace. Now do it with the keyboard shortcut.
Do not be surprised if you saw nothing happen! What you just did is send the message + with argument 4 to the number 3. Normally the result 7 will have been computed and returned to you, but since the workspace did not know what to do with this answer, it simply threw the answer away. If you want to see the result, you should print it instead. print it actually compiles the expression, executes it, sends the message printString to the result, and displays the resulting string.
\(\bigstar\) Select 3+4 and print it (CMD–p).
This time we see the result we expect (Figure \(\PageIndex{2}\)).
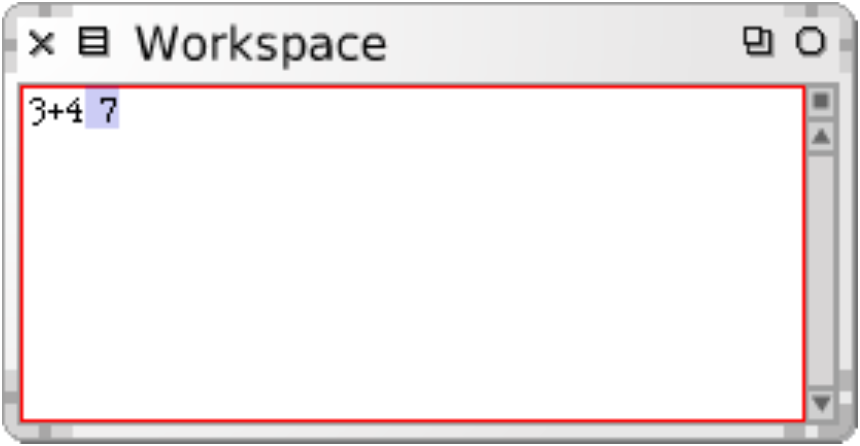
3+4 → 7
We use the notation \(\rightarrow\) as a convention in this book to indicate that a particular Squeak expression yields a given result when you print it.
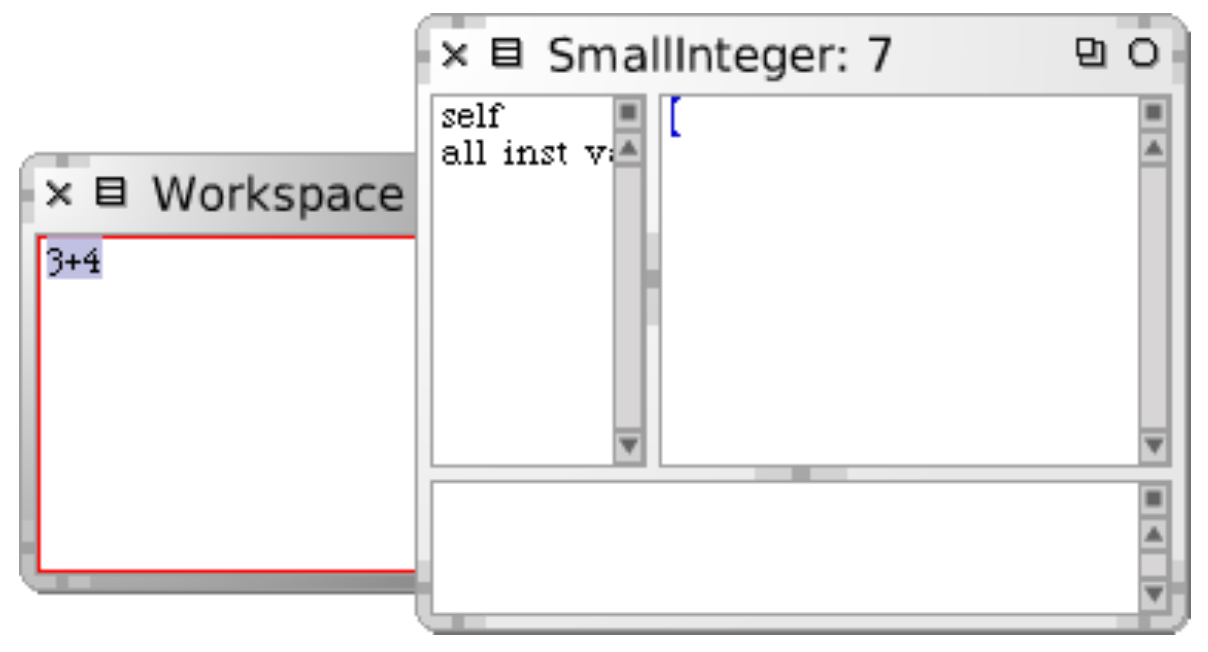
\(\bigstar\) Delete the highlighted text “7” (Squeak should have selected it for you, so you can just press the delete key). Select 3+4 again and this time inspect it (CMD–i).
Now you should see a new window, called an inspector, with the heading SmallInteger: 7 (Figure \(\PageIndex{3}\)). The inspector is an extremely useful tool that will allow you to browse and interact with any object in the system. The title tells us that 7 is an instance of the class SmallInteger. The left panel allows us to browse the instance variables of an object, the values of which are shown in the right panel. The bottom panel can be used to write expressions to send messages to the object.
\(\bigstar\) Type self squared in the bottom panel of the inspector on 7 and print it.
\(\bigstar\) Close the inspector. Type the expression Object in a workspace and this time explore it (CMD–I, uppercased i).
This time you should see a window labelled Object containing the text ⊳ root: Object. Click on the triangle to open it up (Figure \(\PageIndex{4}\)).
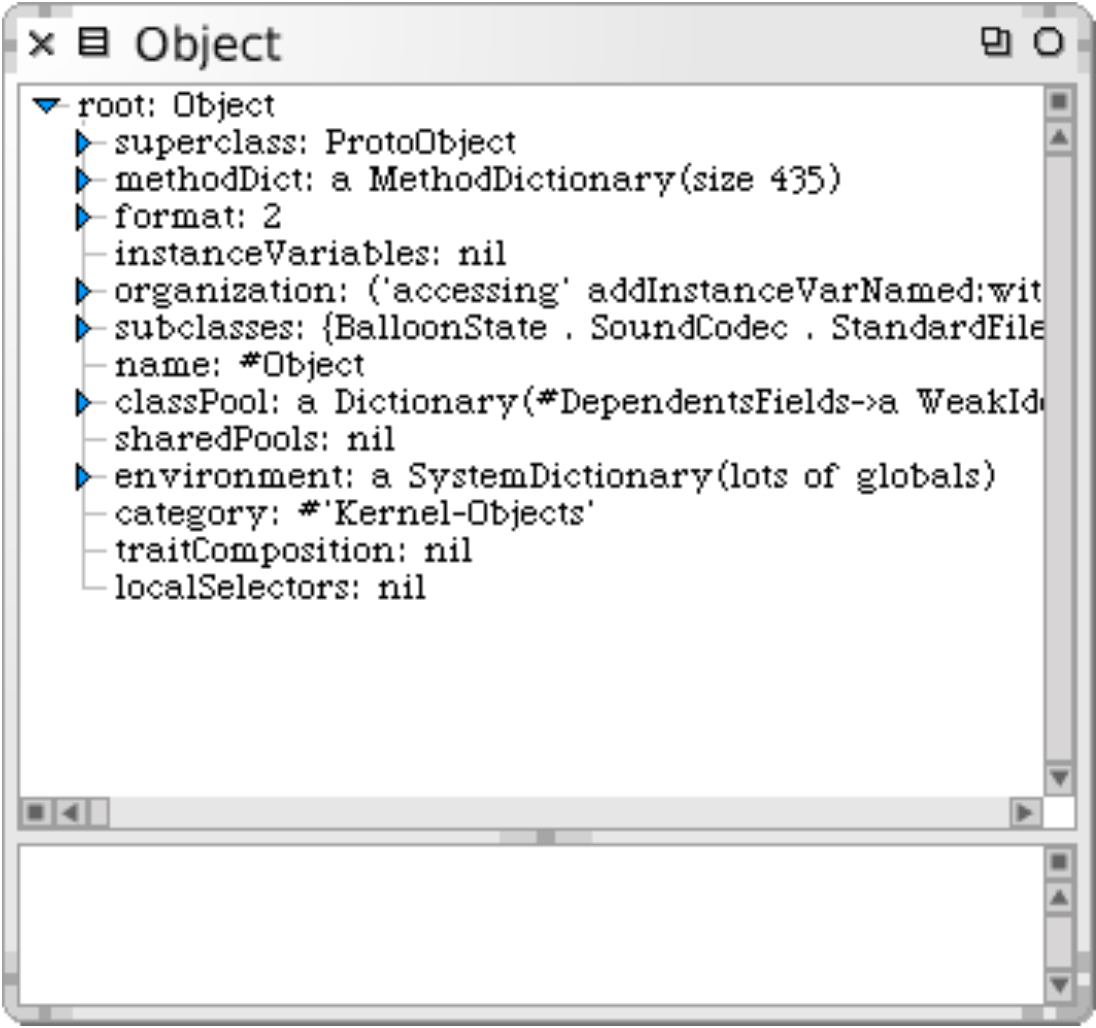
The explorer is similar to the inspector, but it offers a tree view of a complex object. In this case the object we are looking at is the Object class. We can see directly all the information stored in this class, and we can easily navigate to all its parts.