
6.1: Installation
- Page ID
- 25711

One reason the Arduino system was chosen for this course is because of its low cost. The software is free and development boards are available for under $30. If you have already installed the Arduino software on your computer or do not intend to, skip forward to the next section entitled “IDE”.
To install, first simply go to http://arduino.cc/en/Main/Software and download the current version of the software for your operating system. It is available for Windows, Mac and Linux. On Windows, the software is packed into a zip file. This will need to be unzipped with a program such as WinZip. Once unzipped, simply run the setup executable file. This will install almost all of the files needed in short order. There is only one glitch, and that involves installing the driver for your board. Once the software is loaded, plug your Arduino board into your PC via a USB A to USB B cable. In a moment Windows will inform you that it found new hardware and is looking for a driver for it. If you select to see “details”, Windows will pop up something like this (Windows 7):
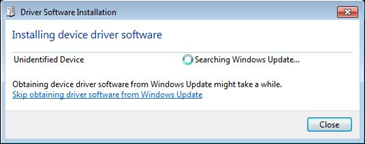
Figure \(\PageIndex{1}\)
The glitch is that Windows won’t be able to find the driver and you’ll be greeted with something like this:
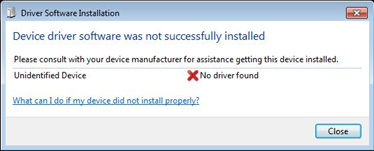
Figure \(\PageIndex{2}\)
Not to worry. You can install the driver manually. The precise process varies a little from XP to Vista to 7 but goes generally as follows. First, open the Device Manager (via Control Panel>>System>>Hardware). Scroll down to “Ports”. You should see entry like “Arduino Uno R3 (COM1)”. (You might instead find it under “Unknown Devices” instead of “Ports”.) Select this and go to the Driver tab. Click on Update/Install Driver. Browse to find your driver. It will be located in the “drivers” directory of the Arduino software install directory. For the Uno, it will be named “Arduino Uno R3.inf”. Select it and let Windows install it. If you have difficulty, a step-by-step guide is available here: http://arduino.cc/en/Guide/Windows Also, a step-by-step installation guide is available at www.robotc.net/wikiarchive/ARDUINO complete with Windows pics.