3.9: Displaying Pictures
- Page ID
- 93798
In addition to presenting text content, Web pages can display graphic images. Later tutorials discuss this topic more fully. Here, basic methods of placing pictures on a page are introduced.
Graphic Formats
There are three popular graphic formats used for Web images. GIF (Graphics Interchange Format) is the most widely supported. Pictures saved in this format have the .gif file extension. GIF format can display images in black and white, grayscale, or color. It is most often used for line drawings, logos, icons, and other "spot color" images, and is usually not for "continuous color" images such as photographs. Incidentally, the acronym GIF is pronounced "jiff."
The PNG (Portable Network Graphics) format was designed as a replacement for the GIF format. PNG, pronounced "ping," has the advantage over GIF of improving image quality while offering better image compression. It does not, however, support animated images. PNG files use the .png extension.
The JPEG (Joint Photographic Experts Group) format, pronounced "j-peg," is designed for storing photographic images. It can represent millions of colors, and uses compression techniques to compact all of color information into small file sizes. Pictures saved in this format usually have the .jpg file extension.
You can display pictures taken with digital cameras or scanned from photographs, or you can copy images from public clip art collections on the Web. If you have available any of the popular graphic editing software packages, then it is usually a simple matter to edit, resize, and convert digital photographs or scanned images to Web formats. Be sure that images are saved in GIF, PNG, or JPEG format for display on your Web pages. Other formats may display properly in the browser, but their large file sizes may make it impractical for visitors to download these images during Web access.
Capturing Images
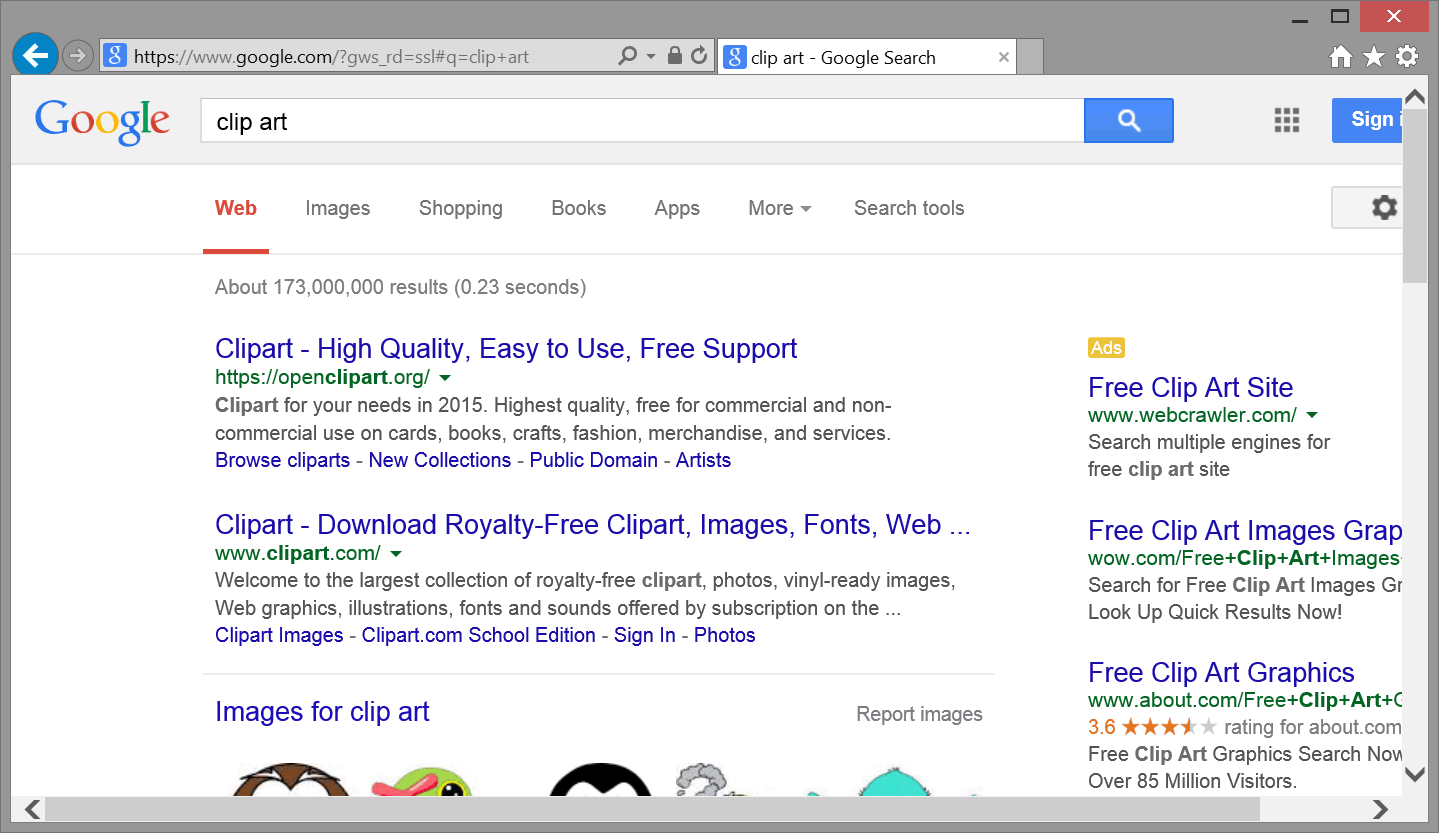
Some of you may have the talent to create your own graphic images; most of you probably do not. Therefore, you may need to locate existing illustrations that complement the text content on your pages. The Web is a rich source of graphics, and many pictures are available for capturing. You can use your favorite search engine to locate "clip art" sites with millions of images to choose from. The screen display in Figure \(\PageIndex{1}\) shows a Google search finding over 32 million sources of clip art.
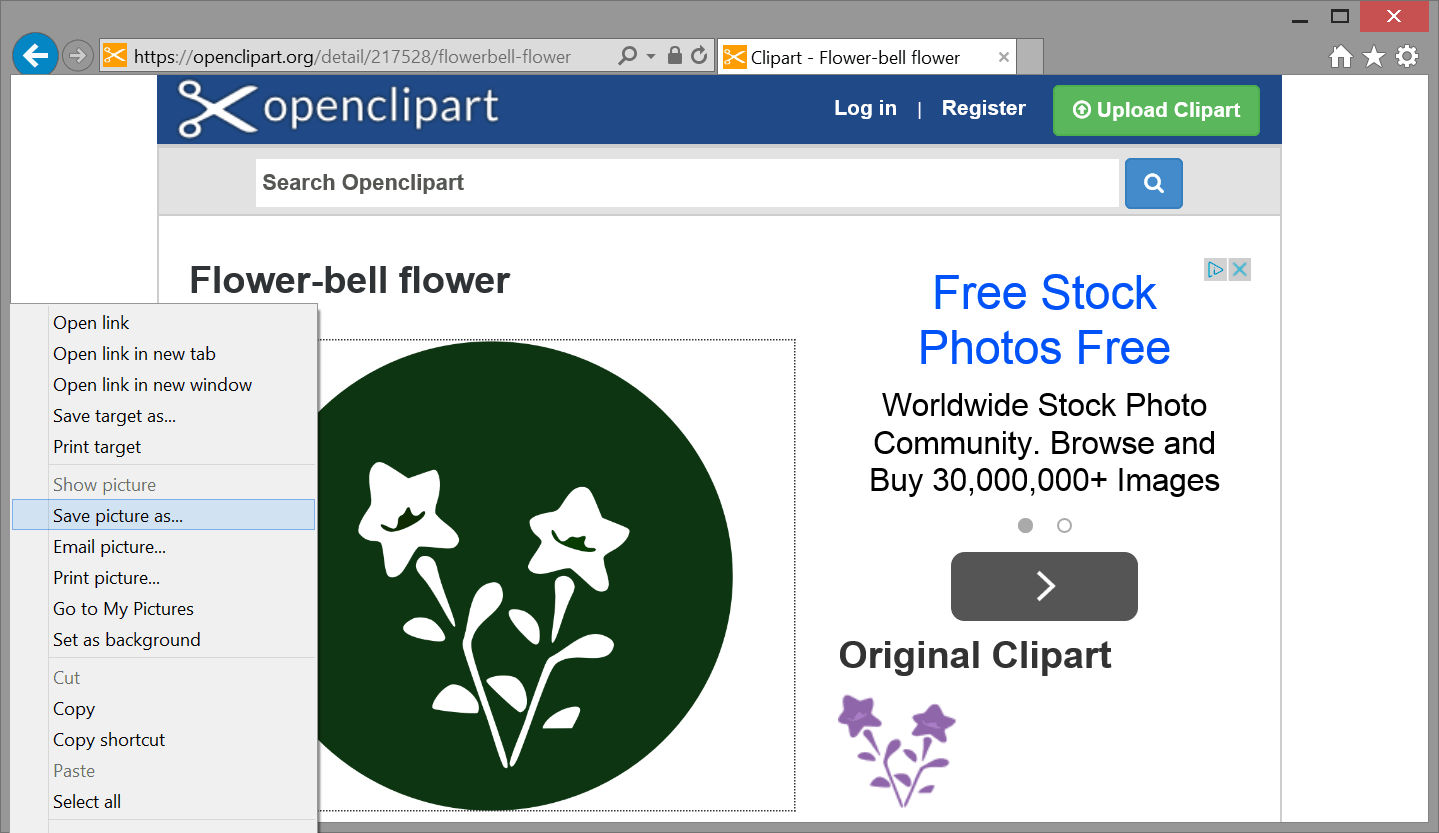
Once you have found the picture you want to download, it is easy to capture it for your use. As shown in Figure \(\PageIndex{2}\), right-click on the picture and choose "Save Picture As..." from the pop-up menu. In the Save dialog box choose the location on your local PC to download the image. The location can be in the same directory as the Web page on which it will be displayed, or you can create a separate subdirectory for storing media files. You can also rename the picture during its saving if you wish. Be alert to images that are copyrighted. You need permission to use these.
The <img> Tag
Image formats GIF, PNG, and JPEG are placed on Web pages by using the in-line <img> tag. The general format for this tag is shown below.
<img src="url" alt="text"/>
An <img> tag is coded on the Web page at the location at which the image is to be displayed. The src attribute gives the source, or location, of the image file. If the file is in the same directory as the Web page on which it is displayed, then only the file name is needed as the src URL.
The alt attribute is required under HTML5. Its "text" value gives a brief pop-up description of the image when the mouse is moved on top of the picture. This text string is displayed when users have graphic displays turned off in their browsers, thus giving a text description of missing pictures. Also, the text can be vocalized by special reader software used by visually impaired visitors who otherwise might not be able to see or focus clearly on images.
Note that the <img> tag is an empty tag; it does not use a pair of opening and closing tags since it does not surround any content. It only marks the page location of an image. By default, the picture is aligned at the left margin of the page.
The JPEG image shown in Figure \(\PageIndex{3}\) is assumed to be located in the same directory as the Web page that displays it. The image is placed on the page at the location of the <img> tag with the accompanying code. (Move your mouse pointer on top of the image to view its pop-up alt box.)
<p><img src="Stonehenge.jpg" alt="Picture of Stonehenge"/></p>

<img> tag.Notice that you do not physically place the image on the Web page. Rather, you include an <img> tag containing a URL address for the image file. When the Web page is loaded into the browser this URL is used to locate the image file, which is then transmitted separately to the browser for display on the page. This is why image file sizes are important considerations. Displaying an image requires an additional data transmission from the Web server ‒ one for each image appearing on the page. Therefore, try to keep the number of images and their sizes as small as possible in order to reduce the number and length of transmissions needed to fill a Web page.
More information about placing images on Web pages is presented in later tutorials. For now, you should be able to modestly decorate your pages with your own pictures or those copied from clip art collections.
Using Graphics as Links
Graphic images can be used as links in the same way as text strings. In this case, an <img> tag is surrounded by an <a> tag to make the image click sensitive and to link to the page or site coded in the href attribute.
The following image was copied from the www.google.com Web site and saved to a local Web directory. It is placed on the page and made into a clickable link to the site that opens in a separate browser window.
<a href="http://www.google.com"><img src="Google.gif" alt="Link to Google"></a>
Notice that the above image is surrounded by a border. In much the same way as text strings used as links are underlined, graphic images used as links are displayed with a border. The border is a visual indication that the picture is a link. You can eliminate the border with the deprecated attribute border="0" coded in the <img> tag. More current techniques for working with borders are described in a later tutorial.
Creating a Media Subdirectory
As you produce more and more Web pages, you will get to the point where your Web directory starts to become overloaded and disorganized. Preferably, documents and picture files that relate to different Web sites or applications should be kept together inside their own separate subdirectories. This arrangement makes it easier to locate and work with related files.
One of the common ways to begin this organization is to create a separate subdirectory within the main Web directory just for your graphic files. In this way, all of your Web pages remain in the main Web directory and all supporting files reside in the subdirectory. Figure \(\PageIndex{4}\) shows a typical arrangement of Web directories, with a Media subfolder inside the main Web folder.
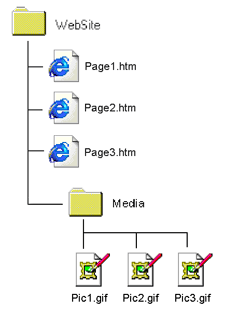
Figure \(\PageIndex{4}\): Web directory structure. ("MGA Web Development Tutorials" by Floyd, Kevin; Kwak, Myungjae; and Stines, Alan, Computer Science and Information Technology Ancillary Materials. 4, GALILEO Open Learning Materials is licensed under CC BY-SA 4.0)
If you create this Media subfolder, then the relative URL for the src attribute of <img> tags needs to reflect this directory structure. For example, if Page1.htm in the accompanying illustration displays Pic1.gif located in the Media subfolder, then its <img> tag needs to be coded as:
<img src="Media/Pic1.gif" alt="Image Pic1"/>
This coding indicates that, relative to the directory location of Page1.htm, the Pic1.gif image is located one level down in the directory hierarchy, inside the Media subdirectory. In a later tutorial, the organization of Web pages and supporting files is covered in more detail. At present, you can begin to bring order to your Web files by placing images in a separate subdirectory.
Deprecated Image Alignment
Horizontal placement of an image can be controlled by enclosing the <img> tag inside a <p> tag which aligns the image to the left, to the right, or centered on the line. Paragraph alignment can use the deprecated align="left|center|right" attribute of the <p> tag. The picture below, for example, is centered on a line by itself and is preceded and followed by blank lines with the enclosing <p> tag.
<p align="center"><img src="Stonehenge.jpg" alt="Picture of Stonehenge"></p>
Later you will learn more about placing and aligning images on a page. For present purposes consider use of the paragraph's align attribute only as a quick fix for aligning images.
Image width and height Attributes
A downloaded image may not be the exact size you need for your page. The best solution is to open it in a graphic editing program in order to size or crop the picture to the dimensions you need prior to placing it on the page. An alternative is to resize the picture dynamically, during browser display, by setting the <img> tag's width and height attributes:
width="n"

height="n"
These n sizes are given in pixels. You need only to set one or the other dimension, but not both, to maintain proportionality. The browser automatically adjusts the other dimension to keep the picture in correct proportion.
The original size of the downloaded image shown below is 480 pixels (width) by 641 pixels (height). It is resized during browser display with the tag:
<img src="Flower.jpg" alt="Picture of flower" width="200">

By resetting the display width only, the browser adjusts the height setting to ensure that proper proportions are maintained. Even though the image is resized by the browser, the original image file size remains the same. For large images, this can mean excessive time to display an image since the entire file must be transmitted to the visitor's computer prior to resizing it on-the-fly for screen display.


