
7.1: Styling Lists
- Page ID
- 93819
Styling Lists
Previously you were introduced to some of the basic style properties used to format page elements. The following sections add to your repertoire of properties by focusing on ways to add special styling to page elements. In this section, various ways of adding special styles to list structures are discussed.
Styling Unordered Lists
<ul>
    <li>List Item 1</li>
    <li>List Item 2</li>
    <li>List Item 3</li>
</ul>
- List Item 1
- List Item 2
- List Item 3
One of the list structures is an unordered list: a series of items preceded by bullet characters and set off from surrounding text by single blank lines. The list is single spaced and indented from the left margin. An example unordered list is coded and displayed below.
Bullet types can be specified by using the deprecated type="disc|circle|square" attribute of the <ul> tag. Preferably, style sheet properties should replace this attribute. For unordered lists, there are two style properties that can be used to designate the type of bullet symbol with which to prefix list items. These properties and their associated values are shown in Figure \(\PageIndex{2}\).
| Property | Value |
|---|---|
| list-style-type | disc circle square none |
| list-style-image | url(url) |
Figure \(\PageIndex{2}\): List-style bullet types.
Specifying Bullet Characters
The unordered list shown in Figure \(\PageIndex{3}\) uses the list-style-type property to display a circle as the bullet type. Styling is given in an embedded style sheet entry for the ul selector.
<style type="text/css">ul {list-style-type:circle}</style><ul><li>List Item 1</li><li>List Item 2</li><li>List Item 3</li></ul>
Of course, by using the simple selector ul in the stylesheet, all unordered lists on the page will have circle bullets. It might be preferable to use ID selectors so that different lists can be assigned different bullet characters. The following style sheet identifies three such lists, each with its own prefix character.
<style type="text/css">ul#List1 {list-style-type:disc}ul#List2 {list-style-type:circle}ul#List3 {list-style-type:square}</style>
A particular list structure takes on a bullet type by assigning the associated id to its <ul> tag. That is, a list identified with the tag <ul id="List3"> will have square characters as bullets.
Setting Margins for Unordered Lists
Normally, unordered lists are indented a fixed number of pixels from the left margin. In certain cases, you may not wish the list of items to be indented. You can include a margin-left style setting to move items to the left margin (the margin setting for the list equates to the margin setting for its container). In the following code, this margin setting is added to the ul selector to align bullets at a page margin of 20 pixels.
<style type="text/css">ul {list-style-type:circle; margin-left:20px}</style>
Suppressing Display of Bullet Characters
You may wish to use other than the supplied bullet characters to prefix your list. In the following example, the list-style-type property is set to none to remove display of bullets. Then each list item is prefixed with an arrowhead character from the Webdings font (the numeric character "4" displays the right-arrowhead symbol in this font family).
<style type="text/css">ul {list-style-type:none; margin-left:20px}</style><ul><li><span style="font-family: webdings">4</span> List Item 1</li><li><span style="font-family: webdings">4</span> List Item 2</li><li><span style="font-family: webdings">4</span> List Item 3</li></ul>

In this example, the default bullet character is not replaced by the arrowhead. Instead, visibility of bullets is suppressed and the arrowhead character is added to the beginning of each list item. Even though bullet display is suppressed, room for the hidden character still occupies space on the line. Therefore, a margin-left setting is needed to move the list items back to their normal positions.
Consider the following list in which the right-arrowhead character has been added in front of the items, but the display of default bullets has intentionally not been suppressed.
<style type="text/css">ul {margin-left:20px}</style><ul><li><span style="font-family: webdings">4</span> List Item 1</li><li><span style="font-family: webdings">4</span> List Item 2</li><li><span style="font-family: webdings">4</span> List Item 3</li></ul>
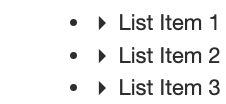
When list-style-type:none is added to the style sheet, the default disc characters are not displayed; however, the space occupied by these characters remains. In order to move the list and the arrowheads to the left to occupy that space and retain normal indention of list items, the margin-left property is added to the style sheet. A left margin of approximately 20 pixels aligns the right-arrowhead characters at the position previously occupied by the bullets.
Using Graphic Images for Unordered Lists
Rather than using text characters as bullets, you can use graphic images to prefix list items by coding the list-style-image:url(url) property. If the image is in the same directory as the page containing the list, then the url is simply the name of the graphic file. In the following example an image named Bullet.gif is used to prefix list items. Browser output is shown in Figure \(\PageIndex{11}\).
<style type="text/css">ul {list-style-image:url(Bullet.png); vertical-align:middle}</style><ul><li>List Item 1</li><li>List Item 2</li><li>List Item 3</li></ul>
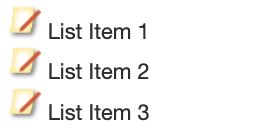
Depending on the size of the image you may have to adjust vertical alignment of the list items to align properly with the image. Normally, text aligns at the bottom of an in-line image. In this example the vertical-align:middle property is applied to the image to align its accompanying text with the middle of the image. Also, text-top and text-bottom values can be used to vertically align text with the top or bottom of an image.
Styling Ordered Lists
An ordered list is a series of items preceded by sequence numbers and set off from surrounding text by single blank lines. The list is single spaced and indented from the left margin in the same way as an unordered list. A default ordered list is coded and displayed as shown below.
<ol><li>List Item 1</li><li>List Item 2</li><li>List Item 3</li></ol>
- List Item 1
- List Item 2
- List Item 3
Style sheet settings can be used to designate the type of numbering symbol to prefix list items. The list-style-type property can be applied using the values shown in Figure 6-8. The decimal value is default.
| Property | Value |
|---|---|
| list-style-type | decimal upper-alpha lower-alpha upper-roman lower-roman none |
Specifying Number Characters
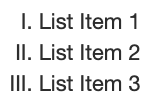
The following ordered list is numbered with upper-roman numerals. Browser output is shown in Figure \(\PageIndex{16}\).
<style type="text/css">ol {list-style-type:upper-roman}</style><ol><li>List Item 1</li><li>List Item 2</li><li>List Item 3</li><ol>
Nested Ordered Lists
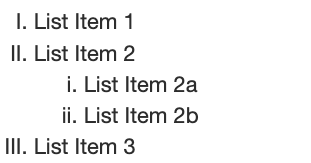
Ordered lists can be nested inside each other with each list having its own numbering scheme. In the following example, an outer list is numbered with upper-case Roman numerals and an inner list is numbered with lower-case Roman numerals. Numbering characters are assigned to particular lists by using ID selectors.
<style type="text/css">ol#List1 {list-style-type:upper-roman}ol#List2 {list-style-type:lower-roman}</style><ol id="List1"><li>List Item 1</li><li>List Item 2<ol id="List2"><li>List Item 2a</li><li>List Item 2b</li></ol></li><li>List Item 3</li><ol>
Styling Definition Lists
A definition list is a series of terms and definitions offset from surrounding text by a single blank line. The terms in the list are blocked at the left margin; definitions are indented and words wrapped on the following lines.
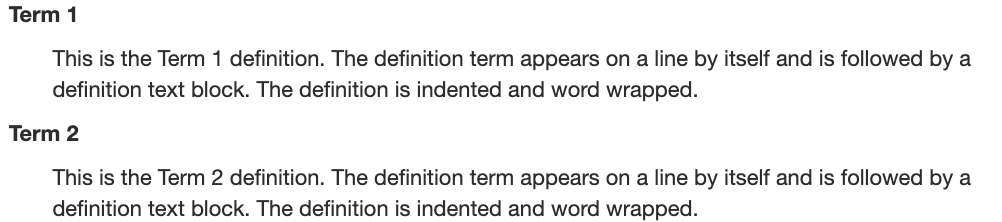
Recall that a definition list is enclosed inside <dl> tags and contains one or more <dt> tags listing the terms to be defined. Each term has an associated <dd> tag surrounding its definition. An example definition list is coded below and displayed in Figure \(\PageIndex{20}\).
<dl><dt>Term 1</dt><dd>This is the Term 1 definition. The definition term appears on a line by itself and is followed by a definition text block. The definition is indented and word wrapped.</dd><dt>Term 2</dt><dd>This is the Term 2 definition. The definition term appears on a line by itself and is followed by a definition text block. The definition is indented and word wrapped.</dd></dl>
- Term 1
- This is the Term 1 definition. The definition term appears on a line by itself and is followed by a definition text block. The definition is indented and word wrapped.
- Term 2
- This is the Term 2 definition. The definition term appears on a line by itself and is followed by a definition text block. The definition is indented and word wrapped.
There are no style properties specifically designed for definition lists. Fortunately, you can apply other formatting styles to a list to give it a different look and alignment. In the following example, the above list is given additional spacing between items by applying margin settings to the <dd> tags.
<style type="text/css">dd {margin-top:10px; margin-bottom:10px}</style><dl><dt>Term 1</dt><dd>This is the Term 1 definition. The definition term appears on a line by itself and is followed by a definition text block. The definition is indented and word wrapped.</dd><dt>Term 2</dt><dd>This is the Term 2 definition. The definition term appears on a line by itself and is followed by a definition text block. The definition is indented and word wrapped.</dd></dl>
Contextual Selectors
List structures present a good opportunity to discuss an additional method -- an addendum to ID selectors -- to apply selective styling to XHTML elements. Consider this scenario for two lists requiring different stylings: the list items in an unordered list are displayed in a different color from those in an ordered list.
The two lists could apply different color settings through their tag selectors. That is, the ul selector could take on a different color from the ol selector with the following code.
<style type="text/css">ul {color:red}ol {color:blue}</style><ul><li>Red Item 1</li><li>Red Item 2</li><li>Red Item 3</li></ul><ol><li>Blue Item 1</li><li>Blue Item 2</li><li>Blue Item 3</li></ol>
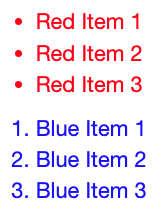 Figure \(\PageIndex{24}\): Unordered and ordered lists displayed in different colors.
The <ul> list is displayed in red and the <ol> list is displayed in blue. An alternative is to focus on differences in the <li> tags between the two lists. The <li> tag appearing in the <ul> list needs to be assigned a different color from the <li> tag appearing in the <ol> list. The need is to differentiate between the <li> tags appearing in the two lists. This differentiation is made with the following style sheet format.
<style type="text/css">ul li {color:red}ol li {color:blue}</style>
The pairs of selectors -- ul li and ol li -- describe the combination of tags that must occur for the associated style to be applied. These contextual selectors -- two or more selectors separated by blank spaces -- provide the tag relationships that must occur before the style is applied. The preceding code sets the color to red where an <li> tag follows a <ul> tag, and the color is set to blue when an <li> tag follows an <ol> tag. That is, the <li> tag takes on a style depending on its context, whether it is associated with a <ul> tag or with an <ol> tag.
Contextual selectors can also include ID selectors to further differentiate styles. The following code uses id values to distinguish two unordered lists for the purpose of applying different bullet styles. At the same time, the two sets of list items are assigned different colors depending on which unordered list they appear in.
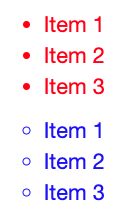
<style type="text/css">ul#ListA {list-style-type:disc}ul#ListB {list-style-type:circle}ul#ListA li {color:red}ul#ListB li {color:blue}</style><ul id="ListA"><li>Item 1</li><li>Item 2</li><li>Item 3</li></ul><ul id="ListB"><li>Item 1</li><li>Item 2</li><li>Item 3</li></ul>
The two lists are differentiated in the style sheet by id values assigned to their <ul> tags. The first two style settings apply different bullet styles to the identified ul selectors. The last two style settings apply different colors to the li selector depending on which ul list it is contained in. The li color style depends on the ul ID context. Browser output of this code is shown in Figure \(\PageIndex{27}\).
Use of contextual selectors is not limited to styling list structures. There will be numerous occasions throughout these tutorials where they are used to differentiate all manner of tag combinations.
Using Lists and CSS for Navigation Layout
Semantically speaking, since a navigation menu is a list of hyperlinks, it is much better to use unordered lists to configure a navigation menu. The following code block demonstrates how to use a list to create a navigation menu:
<div id="menu"><ul><li><a href="home.htm">Home</a>/li><li><a href="about.htm">About Us</a></li><li><a href="products.htm">Products</a></l<li><a href="contact.htm">Contact Us</a></li></ul></div>
Figure \(\PageIndex{28}\): list-style-type CSS property
The list-style-type CSS property can be set to none to prevent the browser from displaying the bullets. In addition, the CSS display property can be used to configure the list structure as an inline element. By default, a list structure is a block level element that displays each list item vertically down the page. Setting each list item to display inline will create a horizontal list of navigation items. The code to accomplish this is shown below:
.menu li {display: inline; list-style-type:none}

Figure \(\PageIndex{29}\): Inlined Lists
Additional spacing between each menu item can be added using the margin property.