
6.2: Basic Usage
- Page ID
- 43820

We will start by reviewing the basics of creating a package and committing changes, and then we will see how to update and merge changes.
Running example — perfect numbers
We will use a small running example of perfect numbers1 in this chapter to illustrate the features of Monticello. We will start our project by defining some simple tests.
\(\bigstar\) Define a subclass of TestCase called PerfectTest in the package Perfect, and define the following test methods in the protocol running:
PerfectTest»testPerfect
    self assert: 6 isPerfect.
    self assert: 7 isPerfect not.
    self assert: 28 isPerfect.
Of course these tests will fail as we have not yet implemented the isPerfect method for integers. We would like to put this code under the control of Monticello as we revise and extend it.
Launching Monticello
Monticello is included in the standard Pharo distribution. Monticello Browser can be selected from the World menu. In Figure \(\PageIndex{1}\), we see that the Monticello Browser consists of two list panes and one button pane. The left pane lists installed packages and the right panes shows known repositories. Various operations may be performed via the button pane and the menus of the two list panes.

Creating a package
Monticello manages versions of packages. A package is essentially a named set of classes and methods. In fact, a package is an object — an instance of PackageInfo — that knows how to identify the classes and methods that belong to it.
We would like to version our PerfectTest class. The right way to do this is to define a package — called Perfect — containing PerfectTest and all the related classes and methods we will introduce later. For the moment, no such package exists. We only have a category called (not coincidentally) Perfect. This is perfect, since Monticello will map categories to packages for us.
\(\bigstar\) Press the +Package in the Monticello browser and enter Perfect.
Voilà! You have just created the Perfect Monticello package.
Monticello packages follow a number of important naming conventions for class and method categories. Our new package named Perfect contains:
- All classes in the category Perfect, or in categories whose names start with Perfect-. For now this includes only our
PerfectTestclass. - All methods belonging to any class (in any category) that are defined in a protocol named *perfect or *Perfect, or in protocols whose names start with *perfect- or *Perfect-. Such methods are known as extensions. We don’t have any yet, but we will define some very soon.
- All methods belonging to any classes in the category Perfect, or in categories whose names begin with Perfect-, except those in protocols whose names start with * (i.e., those belonging to other packages). This includes our
testPerfectmethod, since it belongs to the protocolrunning.
Committing changes

Note in Figure \(\PageIndex{2}\) that the Save button is disabled (greyed out).
Before we save our Perfect package, we need to specify to where we want to save it. A repository is a package container, which may either be local to your machine or remote (accessed over the network). Various protocols may be used to establish a connection between your Pharo image and a repository. As we will see later (Section 7.5), Monticello supports a large choice of repositories, though the most commonly used is HTTP, since this is the one used by SmalltalkHub.
At least one repository, called package-cache, is set up by default, and is shown as the first entry in the list of repositories on the right-hand side of your Monticello browser (see Figure \(\PageIndex{1}\)). The package-cache is created automatically in the local directory where your Pharo image is located. It will contain a copy of all the packages you download from remote repositories. By default, copies of your packages are also saved in the package-cache when you save them to a remote server.
Each package knows which repositories it can be saved to. To add a new repository to the selected package, press the +Repository button. This will offer a number of choices of different kind of repository, including HTTP. For the rest of the chapter we will work with the package-cache repository, as this is all we need to explore the features of Monticello.
\(\bigstar\) Select the directory repository named package cache, press Save, enter an appropriate log message, and Accept to save the changes.

The Perfect package is now saved in package-cache, which is nothing more than a directory contained in the same directory as your Pharo image. Note, however, that if you use any other kind or repository (e.g., HTTP, FTP, another local directory), a copy of your package will also be saved in the package-cache.
\(\bigstar\) Use your favorite file browser (e.g., Windows Explorer, Finder or XTerm) to confirm that a file Perfect-XX.1.mcz was created in your package cache. XX corresponds to your name or initials.2
A version is an immutable snapshot of a package that has been written to a repository. Each version has a unique version number to identify it in a repository. Be aware, however, that this number is not globally unique — in another repository you might have the same file identifier for a different snapshot. For example, Perfect-onierstrasz.1.mcz in another repository might be the final, deployed version of our project! When saving a version into a repository, the next available number is automatically assigned to the version, but you can change this number if you wish. Note that version branches do not interfere with the numbering scheme (as with CVS or Subversion). As we shall see later, versions are by default ordered by their version number when viewing a repository.
Class extensions
Let’s implement the methods that will make our tests green.
\(\bigstar\) Define the following two methods in the class Integer, and put each method in a protocol called *perfect. Also add the new boundary tests. Check that the tests are now green.
Integer»isPerfect
    ^ self > 1 and: [self divisors sum = self]

Integer»divisors
    ^ (1 to: self - 1 ) select: [ :each | (self rem: each) = 0 ]

PerfectTest»testPerfectBoundary
    self assert: 0 isPerfect not.
    self assert: 1 isPerfect not.
Although the methods on Integer do not belong to the Perfect category, they do belong to the Perfect package since they are in a protocol whose name starts with * and matches the package name. Such methods are known as class extensions, since they extend existing classes. These methods will be available only to someone who loads the Perfect package.
"Clean" and "Dirty" packages
Modifying the code in a package with any of the development tools makes that package dirty. This means that the version of the package in the image is different from the version that has been saved or loaded.

In the Monticello browser, a dirty package can be recognized by an asterix (*) preceding its name. This indicates which packages have uncommitted changes, and therefore need to be saved into a repository if those changes are not to be lost. Saving a dirty package cleans it.
\(\bigstar\) Try the Browse and Changes buttons to see what they do. Save the changes to the Perfect. Confirm that the package is now "clean" again.
The Repository inspector
The contents of a repository can be explored using a repository inspector, which is launched using the Open button of Monticello (see Figure \(\PageIndex{5}\)).
\(\bigstar\) Select the package-cache repository and open it. You should see something like Figure \(\PageIndex{5}\).

All the packages in the repository are listed on the left-hand side of the inspector:
- an underlined package name means that this package is installed in the image;
- a bold underlined name means that the package is installed, but that there is a more recent version in the repository;
- a name in a normal typeface means that the package is not installed in the image.
Once a package is selected, the right-hand pane lists the versions of the selected package:
- an underlined version name means that this version is installed in the image;
- a bold version name means that this version is not an ancestor of the installed version. This may mean that it is a newer version, or that it belongs to a different branch from the installed version;
- a version name displayed with a normal typeface shows an older version than the installed current one.
Action-clicking the right-hand side of the inspector opens a menu with different sorting options. The unchanged entry in the menu discards any particular sorting. It uses the order given by the repository.
Loading, unloading and updating packages
At present we have two versions of the Perfect package stored safely in our package-cache repository. We will now see how to unload this package, load an earlier version, and finally update it.
\(\bigstar\) Select the Perfect package and its repository in the Monticello browser. Action-click on the package name and select unload package.

You should now be able to confirm that the Perfect package has vanished from your image!
\(\bigstar\) In the Monticello browser, select the package-cache in the repository pane, without selecting anything in the package pane, and Open the repository inspector. Scroll down and select the Perfect package. It should be displayed in a normal typeface, indicated that it is not installed. Now select version 1 of the package and Load it.

You should now be able to verify that only the original (red) tests are loaded.
\(\bigstar\) Select the second version of the Perfect package in the repository inspector and Load it. You have now updated the package to the latest version.
Now the tests should be green again.
Branching
A branch is a line of development versions that exists independently of another line, yet still shares a common ancestor version if you look far enough back in time.
You may create a new version branch when saving your package. Branching is useful when you want to have a new parallel development. For example, suppose your job is doing software maintenance in your company. One day a different division asks you for the same software, but with a few parts tweaked for them, since they do things slightly differently. The way to deal with this situation is to create a second branch of your program that incorporate the tweaks, while leaving the first branch unmodified.
\(\bigstar\) From the repository inspector, select version 1 of the Perfect package and Load it. Version 2 should again be displayed in bold, indicating that it no longer loaded (since it is not an ancestor of version 1). Now implement the following two Integer methods and place them in the *perfect protocol, and also modify the existing PerfectTest test method as follows:
Integer»isPerfect
    self < 2 ifTrue: [ ^ false ].
    ^ self divisors sum = self

Integer»divisors
    ^ (1 to: self - 1 ) select: [ :each | (self \\ each) = 0]

PerfectTest»testPerfect
    self assert: 2 isPerfect not.
    self assert: 6 isPerfect.
    self assert: 7 isPerfect not.
    self assert: 28 isPerfect.
Once again the tests should be green, though our implementation of perfect numbers is slightly different.
\(\bigstar\) Attempt to load version 2 of the Perfect package.
Now you should get a warning that you have unsaved changes.

\(\bigstar\) Select Cancel to avoid overwriting your new methods. Now Save your changes. Enter your log message, and Accept the new version.
Congratulations! You have now created a new branch of the Perfect package.
\(\bigstar\) If you still have the repository inspector open, Refresh it to see the new version (Figure \(\PageIndex{9}\)).

Merging
You can merge one version of a package with another using the Merge button in the Monticello browser. Typically, you will want to do this when (i) you discover that you have been working on a out-of-date version, or (ii) branches that were previously independent have to be re-integrated. Both scenarios are common when multiple developers are working on the same package.
Consider the current situation with our Perfect package, as illustrated at the left of Figure \(\PageIndex{10}\). We have published a new version 3 that is based on version 1. Since version 2 is also based on version 1, versions 2 and 3 constitute independent branches.

At this point we realize that there are changes in version 2 that we would like to merge with our changes from version 3. Since we have version 3 currently loaded, we would like to merge in changes from version 2, and publish a new, merged version 4, as illustrated at the right of Figure \(\PageIndex{10}\).
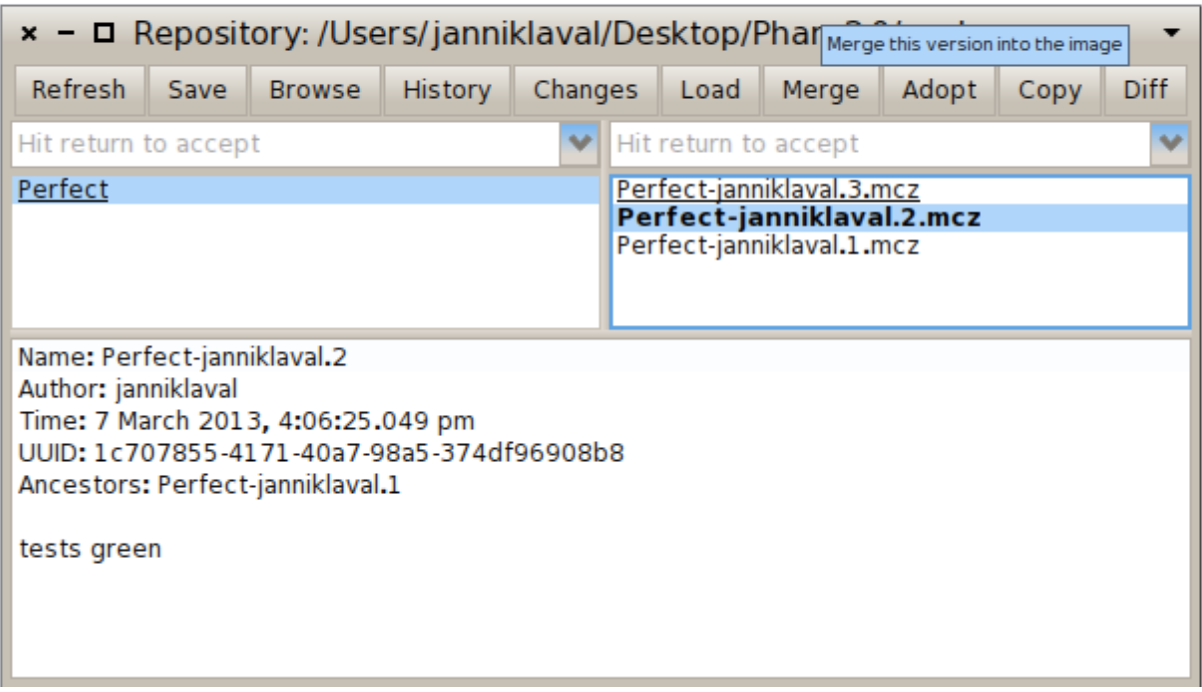
\(\bigstar\) Select version 2 in the repository browser, as shown in Figure \(\PageIndex{11}\), and click the Merge button.
The merge tool is a tool that allows for fine-grained package version merging. Elements contained in the package to-be-merged are listed in the upper text pane. The lower text pane shows the definition of a selected element.

Perfect package being merged with the current version 3.In Figure \(\PageIndex{12}\) we see the three differences between versions 2 and 3 of the Perfect package. The method PerfectTest»testPerfectBoundary is new, and the two indicated methods of Integer have been changed. In the lower pane we see the old and new versions of the source code of Integer»isPerfect. New code is displayed in red, removed code is barred and displayed in blue, and unchanged code is shown in black.
A method or a class is in conflict if its definition has been altered. Figure \(\PageIndex{12}\) shows two conflicting methods in the class Integer: isPerfect and divisors. A conflicting package element is indicated by being underlined, barred, or bold. The full set of typeface conventions is as follows:
Plain=No Conflict. A plain typeface indicates the definition is non-conflicting. For example, the method PerfectTest»testPerfectBoundary does not conflict with an existing method, and can be installed.
Red=A method is conflicting. A decision needs to be made to keep the proposed change or reject it. The proposed method Integer»>isPerfect is in conflict with an existing definition in the image. The conflict can be resolved by right clicking on the method and Keep current version or Use incoming version.
Right arrow=Repository replace current. An element with a right arrow will be used and replace the current element in the image. In Figure \(\PageIndex{12}\) we see that Integer»isPerfect from version 2 has been used.
Left arrow=Repository version rejected. An element with left arrow has been rejected, and the local definition will not be replaced. In Figure \(\PageIndex{12}\) Integer»divisors from version 2 is rejected, so the definition from version 3 will remain.
\(\bigstar\) Use incoming version of Integer>>isPerfect and keep current version of Integer>>divisors, and click the Merge button. Confirm that the tests are all green. Commit the new merged version of Perfect as version 4.
If you now refresh the repository inspector, you will see that there are no more versions shown in bold, i.e., all versions are ancestors of the currently loaded version 4 (Figure \(\PageIndex{13}\)).

- Perfect numbers were discovered by Euclid. A perfect number is a positive integer that is the sum of its proper divisors. 6 = 1 + 2 + 3 is the first perfect number.
- In the past, the convention was for developers to log their changes using only their initials. Now, with many developers sharing identical initials, the convention is to use an identifier based on the full name, such as “apblack” or “AndrewBlack”.