
14.2: Editing Matrices
- Page ID
- 15000

There are many different ways to alter an existing matrix. In these examples, note that we don’t use the variable c since that is the built-in variable for the speed of light (although we could redefine c, there is no need to do so and it is generally a good idea not to overwrite the built-in variables).
- Augmenting a matrix by another matrix (side-by-side)
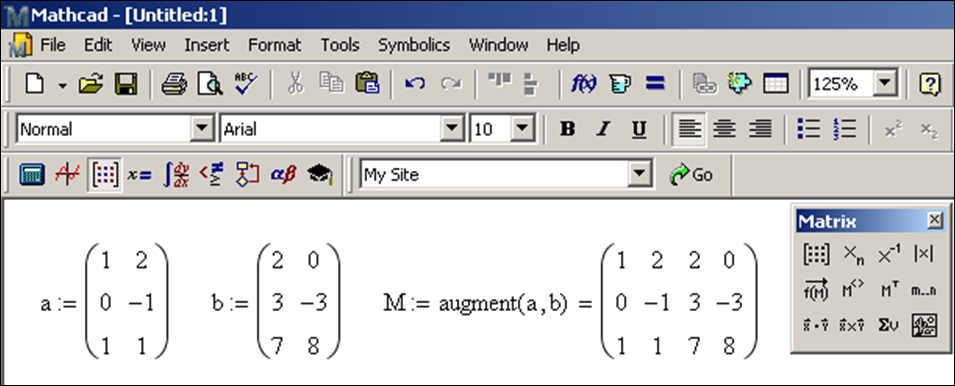
If two matrices have the same number of rows, we can create a new matrix with the command augment:
- Stacking two matrices
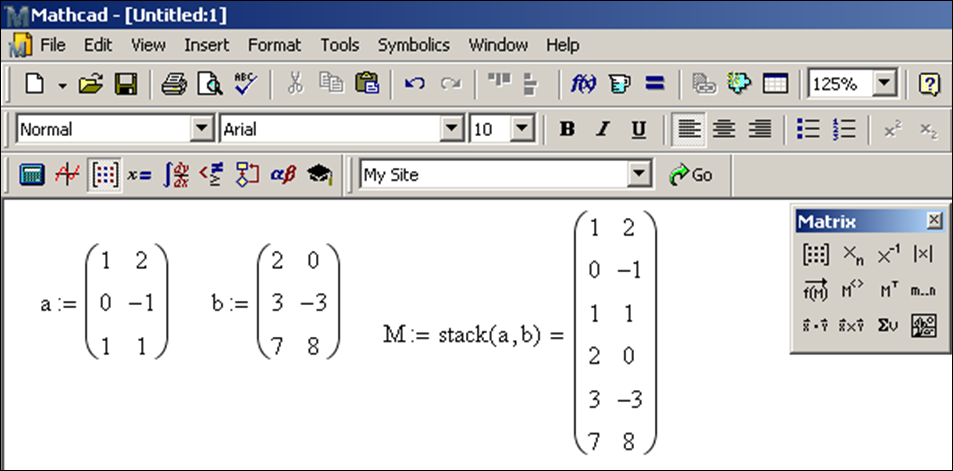
If two matrices have the same number of columns, we can create a new matrix with the command stack:
- Inserting a row or column
To insert new row(s) or column(s) to an existing matrix, select an entry of the matrix. The inserted row(s) or column(s) will appear below or to the right of the selected entry. Then click the  button. Change the entries for the desired number of rows and columns and click “Insert”. If you only want to insert a single row, set the number of columns to zero. If you only want to insert a single column, set the number of rows to zero.
New rows are inserted below a highlighted row and columns are inserted to the right of a highlighted row. If you want to insert a new first row or column, you need to select the whole matrix before using the  button and making the insertion.
- Deleting a row or column
The process of deleting rows or columns is similar to making insertions. To delete rows or columns from an existing matrix, select an entry of the matrix. The deleted rows or columns will contain that entry and delete rows below and columns to the right. Then click the button. Change the entries for the desired number of rows and columns and click “Delete”.