10.5: Layouts
- Page ID
- 43719

A layout defines how a collection of elements is automatically arranged. To apply a layout, use the on: message with a collection of ROElements as parameter. In the example shown in in Figure \(\PageIndex{1}\) we use the spriteOn: convenience message to create a collection of ROElements, each one with size 50, shaped with a red border and draggable. We then apply a layout to arrange the elements on a grid.
view := ROView new.
view addAll: (ROElement spritesOn: (1 to: 4)).
ROGridLayout on: view elements.
view open.
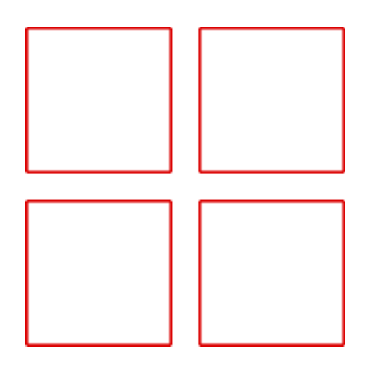
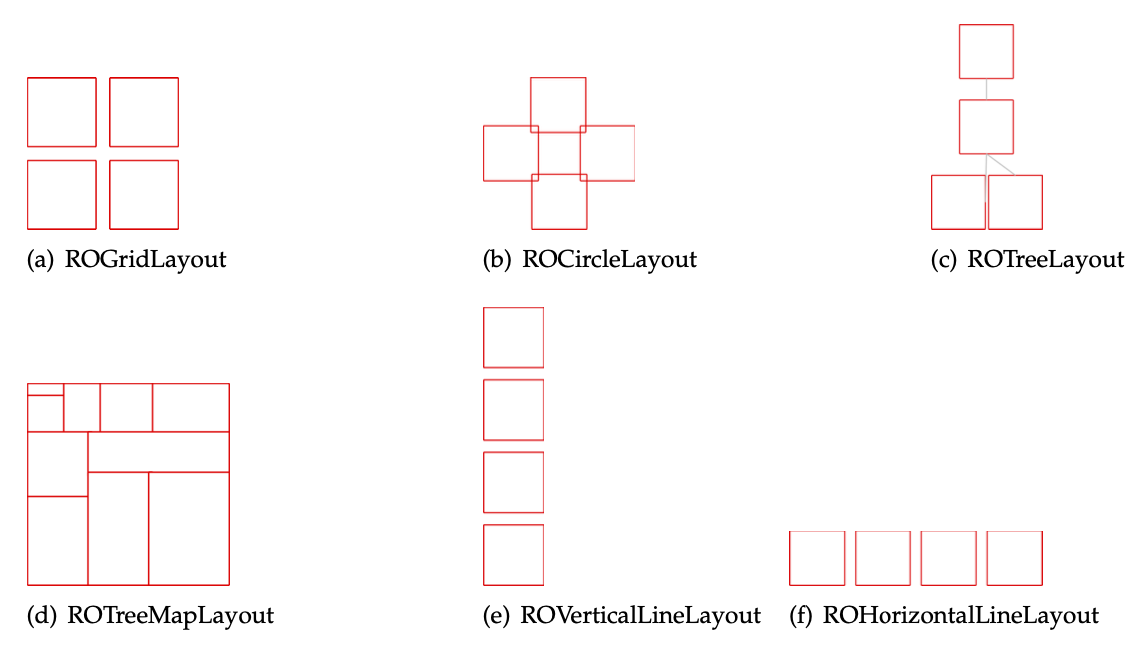
Figure \(\PageIndex{2}\) illustrates some of the layouts available in Roassal. These layouts, in addition to those not presented here, can be found as subclasses of ROLayout.
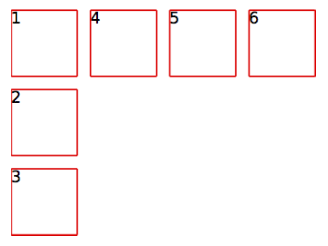
As a layout is applied to a collection of elements, different sets of elements can have different layouts. In the following example two collections of elements are arranged with two layouts. The first one aligns elements along a vertical line and the second along a horizontal line. We first create elements for the vertical line, apply the ROVerticalLineLayout and shape them with a label. We then do the same for the second group, using the ROHorizontalLineLayout and spacing them to avoid overlapping.
| view verticalElements horizontalElements |
view := ROView new.
verticalElements := ROElement spritesOn: (1 to: 3).
ROVerticalLineLayout on: verticalElements.
verticalElements do: [ :el | el + ROLabel ].
horizontalElements := ROElement spritesOn: (4 to: 6).
ROHorizontalLineLayout on: horizontalElements.
horizontalElements do: [ :el |
    el + ROLabel.
    el translateBy: (60@ 0) ].    "spacing"
view
    addAll: horizontalElements;
    addAll: verticalElements.
view open.
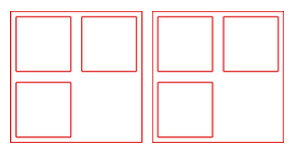
Layouts in nested structures. Layout of nested elements is relative to each element’s containers. In the following example, two elements are created, each one with three child elements arranged as a grid. We finally arrange the parent elements using a horizontal line layout.
view := ROView new.
elements := (ROElement spritesOn: (1 to: 2)).
elements
    do: [ :el | el addAll: (ROElement spritesOn: (1 to: 3)).
        "arranging the children nodes"
        ROGridLayout on: el elements.].
view addAll: elements.
ROHorizontalLineLayout on: view elements.
view open.
Creating a new layout. Roassal offers a number of layouts (over 23 at the time this chapter is being written). It may happen that one needs a new layout to accommodate a particular representation. This section is about dedicate layouts. Before jumping into the creation a new layout, we first need to understand how layouts are structured.
All layout classes inherit from ROLayout. This class defines the most commonly used method to apply a layout, on:, from the instance or from the class side. The method on: calls to executeOnElements:, which is the main method to apply a layout. This method is shown in the following code:
ROLayout >> executeOnElements: elements
    "Execute the layout, myself, on the elements"
    maxInterations := elements size.
    self doInitialize: elements.
    self doExecute: elements asOrderedCollection.
    self doPost: elements.
The executeOnElements: method invokes three hook methods:
doInitialize: Method executed before beginning the layout. Useful when the graph to be ordered needs to be prepared;doExecute: Apply the layout algorithm. Elements are relocated accordingly;doPost: Method executed after having performed the layout.
A pre- and post-processing may be defined. This is useful for example if the layout is multi-staged or if appropriate events have to be emitted. These actions are set as callbacks using the ROLayoutBegin and ROLayoutEnd events. ROLayoutBegin and ROLayoutEnd are announced by doInitialize: and doPost:, respectively. An example of its use is shown in the following code:
| layout t |
t := 0.
layout := ROHorizontalLineLayout new.
layout on: ROLayoutBegin do: [ :event | t := t + 1 ].
layout on: ROLayoutEnd do: [ :event | t := t + 1 ].
layout applyOn: (ROElement forCollection: (1 to: 3)).
self assert: (t = 2).
The doExecute: method arranges elements using a particular algorithm. This method takes as parameter the collection of elements to lay out.
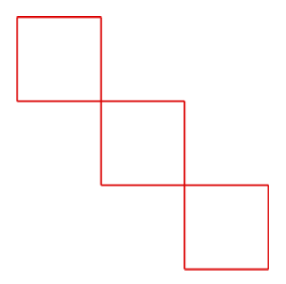
Now we know the structure of the ROLayout class, we will define a new layout, called RODiagonalLineLayout, to position elements along a diagonal line. Creating a subclass of ROLayout is the first step.
ROLayout subclass: #RODiagonalLineLayout
    instanceVariableNames: 'initialPosition'
    classVariableNames: ''
    poolDictionaries: ''
    category: 'Roassal-Layout'
The instance variable initialPosition defines where the virtual line starts, which means, where the first element of the line will be located. This variable is set in an initialize method:
RODiagonalLineLayout >> initialize
    super initialize.
    initialPosition := 0@0.

RODiagonalLineLayout >> initialPosition: aPoint
    initialPosition := aPoint

RODiagonalLineLayout >> initialPosition
    ^ initialPosition
If the layout needed to execute special actions before or after it is applied, we would overwrite the doInitialize: or doPost: methods. However, this is not the case. The method we need to overwrite is doExecute: which actually does the job: translating all the elements along the virtual diagonal line:
RODiagonalLineLayout >> doExecute: elements
    | position |
    position := initialPosition.
    elements do: [ :el |
        el translateTo: position.
        position := position + el extent ]
We can test our layout with the following code:
| view elements |
view := ROView new.
elements := ROElement spritesOn: (1 to: 3).
view addAll: elements.
RODiagonalLineLayout on: view elements.
view open.
One key point of the layouts in Roassal is to consider the size of the elements to layout. When defining a new layout, remember to make your algorithm use the element size.
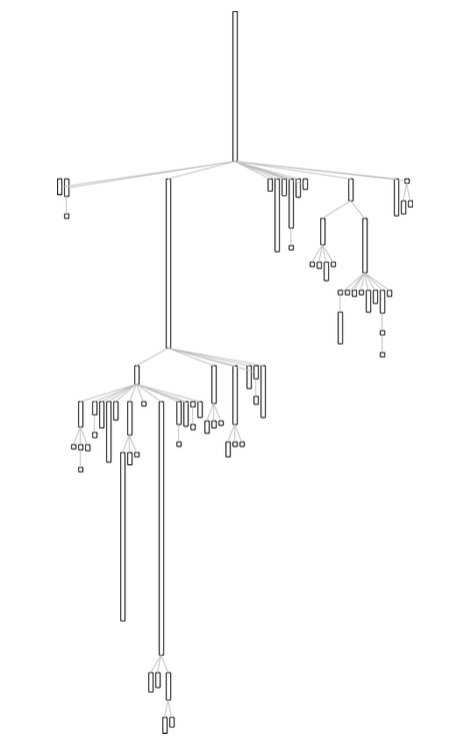
The Collection hierarchy example
As we need a hierarchy for the Collection example, the ROTreeLayout is useful in obtaining an adequate visualization.
"Create the elements to be displayed"
view := ROView new.
classElements := ROElement forCollection: Collection withAllSubclasses.
view addAll: classElements.
associations := OrderedCollection new.
classElements do: [:c |
        "Make each element reflect their model characteristics"
    c width: c model instVarNames size.
    c height: c model methods size.
        "Add shape for the element to be seen"
    c + ROBorder.
        "Make it draggable by the mouse"
    c @ RODraggable.
        "Create associations to build edges"
    (c model superclass = Object)
        ifFalse: [ associations add: ((view elementFromModel: c model superclass) -> c)]
    ].
    "Add edges between each class and its superclass"
edges := ROEdge linesFor: associations.
view addAll: edges.
    "Arrange all the elements as a hierarchy"
ROTreeLayout new on: view elements.
view open
The resulting visualization can be seen in Figure \(\PageIndex{6}\).