
10.4: Edges - Linking Elements
- Page ID
- 43718

With Roassal it is possible to build links between elements to represent relationships between them. A link between two elements is an instance of the class ROEdge. By default, an edge is shaped with an instance of RONullShape, which is the empty shape. Because of this, for an edge to be rendered it needs to be shaped with a line shape, which can be any subclass of ROAbstractLine. The following code illustrates the creation of an edge between two elements. We first create the two elements. We then create the edge using them as parameters and shape it with a line (instance of ROLine) shape. We finally add the two elements and the edge to the view.
Code \(\PageIndex{1}\) (Pharo): Simple edge.
view := ROView new.
start := (ROElement on: 1) size: 20; + ROBorder red.
end := (ROElement on: 2) size: 20; + ROBorder red.
end translateBy: 50@50.
edge := ROEdge from: start to: end.
edge + ROLine.
view
    add: start;
    add: end;
    add: edge.
view open.
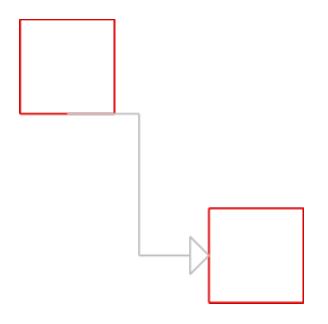
Adding shape to an edge. There are several kinds of line shapes to use besides the standard one, like ROOrthoHorizontalLineShape. All of them are subclasses of the ROAbstractLine class, including ROLine. Some examples are shown in Figure \(\PageIndex{1}\) and Figure \(\PageIndex{2}\).
edge + ROLine.

edge + ROOrthoHorizontalLineShape.

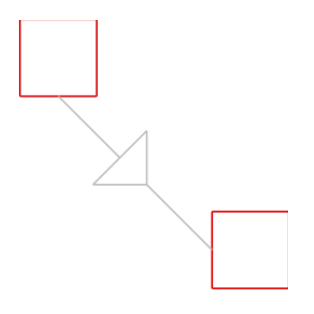
Adding an arrow to a line. A line can also contain one or more arrows. An arrow is an instance of a subclass of ROAbstractArrow, like ROArrow or ROHorizontalArrow. To add an arrow to a line shape we use the add: message, as in Figure \(\PageIndex{3}\) and Figure \(\PageIndex{4}\).
edge + (ROLine new add: ROArrow new).

edge + (ROOrthoHorizontalLineShape new
    add: ROHorizontalArrow new)
By default the arrow will be located at the end of the edge, but we can customize this position using the add:offset:. The offset parameter must be a number between 0 and 1. It indicates in which percent of the line length the arrow will be. For example, if the offset is 0.5, the arrow will be set at the middle of the line, as shown in Figure \(\PageIndex{5}\).
edge + (ROLine new add: ROArrow new offset: 0.5).
When a line contains more than one arrow we can setup different offsets for each arrow:
line := ROLine new.
line add: ROArrow new offset: 0.1.
line add: ROArrow new offset: 0.5.
edge + line.

The Collection hierarchy example
Now we know how to make links between elements. With the following code we can create edges between each class to its superclass. To do so, we first need to create a collection of associations to build edges with them. Each association represents a starting point as the association key and an ending point as the association value. For this example each association goes from a ROElement representing a class to the ROElement that represents its superclass.
Once we have the associations, we create the instances of ROEdge by using the linesFor: message. This message takes as parameter a collection of associations and returns a collection of edges.
view := ROView new.
classElements := ROElement forCollection: Collection withAllSubclasses.
view addAll: classElements.
associations := OrderedCollection new.
classElements do: [ :c |
    c width: c model instVarNames size.
    c height: c model methods size.
    c + ROBorder.
    c @ RODraggable.
    (c model superclass = Object)
        ifFalse: [ associations add: ((view elementFromModel: c model superclass) -> c)]
    ].
edges := ROEdge linesFor: associations.
view addAll: edges.
ROHorizontalLineLayout new on: view elements.
view open

Now we have each class in the Collection hierarchy with the shape we want and connected with each superclass. However we do not see a real hierarchy. This is because we need an appropriate layout to arrange all the elements of the view. The next section covers how to apply layouts to elements.