10.3: Detailing Shapes
- Page ID
- 43717

A graphical component (instance of ROElement or ROEdge) is given a shape by sending the + (or addShape:) message with an argument that is either a subclass of ROShape, or an instance of such a class.
Similarly, the @ message may take as argument either a class or an instance, in order to override default values.
When the parameter of + is a shape, attributes such as the color to be filled or the border color may be individually set. When the class is sent as parameter, the element will be shaped with an instance of that class with default values for each of its attributes.
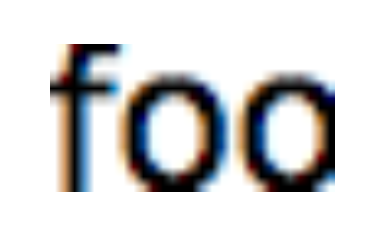
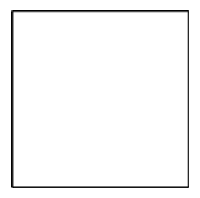
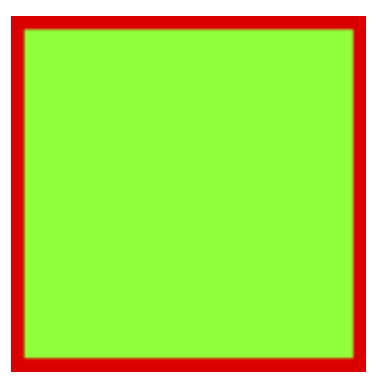
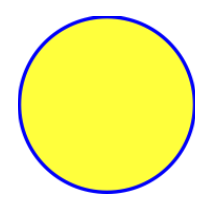
Some of the shapes available are label (ROLabel), border (ROBorder), box (ROBox) and circle (ROEllipse). By default, ROLabel will display the printString value of the model (i.e., object domain) of the element. It is also possible to change it by setting a custom text as shown in Figure \(\PageIndex{1}\). When applying ROBorder, ROBox and ROEllipse to a ROElement, the shape will be adapted to the bounds of the element. It is also possible to set attributes as color, border color or border width to a shape. This is shown in Figure \(\PageIndex{2}\), Figure \(\PageIndex{3}\) and Figure \(\PageIndex{4}\).
ROElement new
    model: 'foo';
    size: 100;
    + ROLabel.
ROElement new
    size: 100;
    + ROBorder.
ROElement new
    size: 200;
    + (ROBox new
        color: Color green;
        borderColor: Color red;
        borderWidth: 4 ).
element := ROElement new size: 100.
shape := ROEllipse new
    color: Color yellow;
    borderColor: Color blue;
    borderWidth: 2.
element + shape.
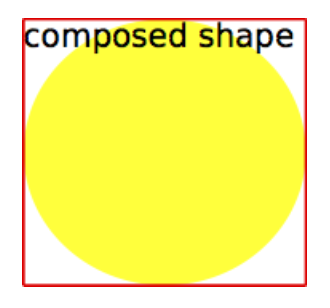
Composing Shapes. To create more elaborated visual aspects, shapes may be composed. To have an element shaped with more than one ROShape, we send the + message several times with the desired shapes (Figure \(\PageIndex{5}\)).
This builds a chain of shapes associated to the element, of which the first component is the latest shape added and its last component is an instance of the empty shape (RONullShape).
| element label border circle |
element := ROElement new size: 180.
label := ROLabel new text: 'composed shape'.
border := ROBorder new color: Color red.
circle := ROEllipse new
    color: Color yellow.
    borderWidth: 0.
element + label.
element + border. element + circle.
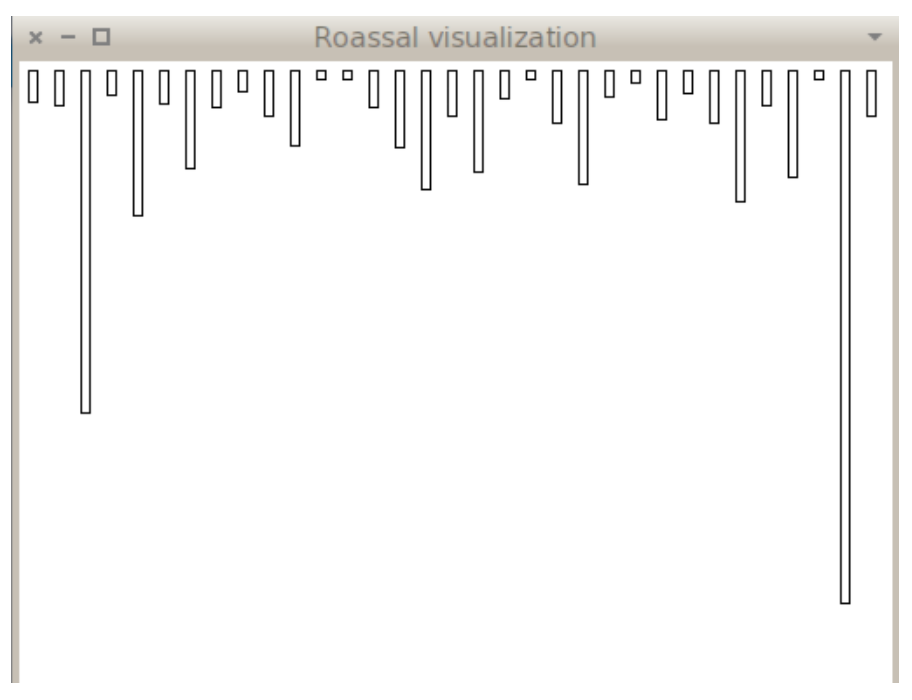
The Collection hierarchy example
We now will add some shapes to the classes in the Collection hierarchy example. Each class representation will have a width representing the number of instance variables of the class and a height representing the number of its methods.
view := ROView new.
classElements := ROElement forCollection: Collection withAllSubclasses.
classElements do: [ :c |
    c width: c model instVarNames size.
    c height: c model methods size.
    c + ROBorder.
    c @ RODraggable ].
view addAll: classElements.
ROHorizontalLineLayout new on: view elements.
view open.