
4.2: Margin Styles
- Page ID
- 93801
\( \newcommand{\vecs}[1]{\overset { \scriptstyle \rightharpoonup} {\mathbf{#1}} } \)
\( \newcommand{\vecd}[1]{\overset{-\!-\!\rightharpoonup}{\vphantom{a}\smash {#1}}} \)
\( \newcommand{\dsum}{\displaystyle\sum\limits} \)
\( \newcommand{\dint}{\displaystyle\int\limits} \)
\( \newcommand{\dlim}{\displaystyle\lim\limits} \)
\( \newcommand{\id}{\mathrm{id}}\) \( \newcommand{\Span}{\mathrm{span}}\)
( \newcommand{\kernel}{\mathrm{null}\,}\) \( \newcommand{\range}{\mathrm{range}\,}\)
\( \newcommand{\RealPart}{\mathrm{Re}}\) \( \newcommand{\ImaginaryPart}{\mathrm{Im}}\)
\( \newcommand{\Argument}{\mathrm{Arg}}\) \( \newcommand{\norm}[1]{\| #1 \|}\)
\( \newcommand{\inner}[2]{\langle #1, #2 \rangle}\)
\( \newcommand{\Span}{\mathrm{span}}\)
\( \newcommand{\id}{\mathrm{id}}\)
\( \newcommand{\Span}{\mathrm{span}}\)
\( \newcommand{\kernel}{\mathrm{null}\,}\)
\( \newcommand{\range}{\mathrm{range}\,}\)
\( \newcommand{\RealPart}{\mathrm{Re}}\)
\( \newcommand{\ImaginaryPart}{\mathrm{Im}}\)
\( \newcommand{\Argument}{\mathrm{Arg}}\)
\( \newcommand{\norm}[1]{\| #1 \|}\)
\( \newcommand{\inner}[2]{\langle #1, #2 \rangle}\)
\( \newcommand{\Span}{\mathrm{span}}\) \( \newcommand{\AA}{\unicode[.8,0]{x212B}}\)
\( \newcommand{\vectorA}[1]{\vec{#1}} % arrow\)
\( \newcommand{\vectorAt}[1]{\vec{\text{#1}}} % arrow\)
\( \newcommand{\vectorB}[1]{\overset { \scriptstyle \rightharpoonup} {\mathbf{#1}} } \)
\( \newcommand{\vectorC}[1]{\textbf{#1}} \)
\( \newcommand{\vectorD}[1]{\overrightarrow{#1}} \)
\( \newcommand{\vectorDt}[1]{\overrightarrow{\text{#1}}} \)
\( \newcommand{\vectE}[1]{\overset{-\!-\!\rightharpoonup}{\vphantom{a}\smash{\mathbf {#1}}}} \)
\( \newcommand{\vecs}[1]{\overset { \scriptstyle \rightharpoonup} {\mathbf{#1}} } \)
\(\newcommand{\longvect}{\overrightarrow}\)
\( \newcommand{\vecd}[1]{\overset{-\!-\!\rightharpoonup}{\vphantom{a}\smash {#1}}} \)
\(\newcommand{\avec}{\mathbf a}\) \(\newcommand{\bvec}{\mathbf b}\) \(\newcommand{\cvec}{\mathbf c}\) \(\newcommand{\dvec}{\mathbf d}\) \(\newcommand{\dtil}{\widetilde{\mathbf d}}\) \(\newcommand{\evec}{\mathbf e}\) \(\newcommand{\fvec}{\mathbf f}\) \(\newcommand{\nvec}{\mathbf n}\) \(\newcommand{\pvec}{\mathbf p}\) \(\newcommand{\qvec}{\mathbf q}\) \(\newcommand{\svec}{\mathbf s}\) \(\newcommand{\tvec}{\mathbf t}\) \(\newcommand{\uvec}{\mathbf u}\) \(\newcommand{\vvec}{\mathbf v}\) \(\newcommand{\wvec}{\mathbf w}\) \(\newcommand{\xvec}{\mathbf x}\) \(\newcommand{\yvec}{\mathbf y}\) \(\newcommand{\zvec}{\mathbf z}\) \(\newcommand{\rvec}{\mathbf r}\) \(\newcommand{\mvec}{\mathbf m}\) \(\newcommand{\zerovec}{\mathbf 0}\) \(\newcommand{\onevec}{\mathbf 1}\) \(\newcommand{\real}{\mathbb R}\) \(\newcommand{\twovec}[2]{\left[\begin{array}{r}#1 \\ #2 \end{array}\right]}\) \(\newcommand{\ctwovec}[2]{\left[\begin{array}{c}#1 \\ #2 \end{array}\right]}\) \(\newcommand{\threevec}[3]{\left[\begin{array}{r}#1 \\ #2 \\ #3 \end{array}\right]}\) \(\newcommand{\cthreevec}[3]{\left[\begin{array}{c}#1 \\ #2 \\ #3 \end{array}\right]}\) \(\newcommand{\fourvec}[4]{\left[\begin{array}{r}#1 \\ #2 \\ #3 \\ #4 \end{array}\right]}\) \(\newcommand{\cfourvec}[4]{\left[\begin{array}{c}#1 \\ #2 \\ #3 \\ #4 \end{array}\right]}\) \(\newcommand{\fivevec}[5]{\left[\begin{array}{r}#1 \\ #2 \\ #3 \\ #4 \\ #5 \\ \end{array}\right]}\) \(\newcommand{\cfivevec}[5]{\left[\begin{array}{c}#1 \\ #2 \\ #3 \\ #4 \\ #5 \\ \end{array}\right]}\) \(\newcommand{\mattwo}[4]{\left[\begin{array}{rr}#1 \amp #2 \\ #3 \amp #4 \\ \end{array}\right]}\) \(\newcommand{\laspan}[1]{\text{Span}\{#1\}}\) \(\newcommand{\bcal}{\cal B}\) \(\newcommand{\ccal}{\cal C}\) \(\newcommand{\scal}{\cal S}\) \(\newcommand{\wcal}{\cal W}\) \(\newcommand{\ecal}{\cal E}\) \(\newcommand{\coords}[2]{\left\{#1\right\}_{#2}}\) \(\newcommand{\gray}[1]{\color{gray}{#1}}\) \(\newcommand{\lgray}[1]{\color{lightgray}{#1}}\) \(\newcommand{\rank}{\operatorname{rank}}\) \(\newcommand{\row}{\text{Row}}\) \(\newcommand{\col}{\text{Col}}\) \(\renewcommand{\row}{\text{Row}}\) \(\newcommand{\nul}{\text{Nul}}\) \(\newcommand{\var}{\text{Var}}\) \(\newcommand{\corr}{\text{corr}}\) \(\newcommand{\len}[1]{\left|#1\right|}\) \(\newcommand{\bbar}{\overline{\bvec}}\) \(\newcommand{\bhat}{\widehat{\bvec}}\) \(\newcommand{\bperp}{\bvec^\perp}\) \(\newcommand{\xhat}{\widehat{\xvec}}\) \(\newcommand{\vhat}{\widehat{\vvec}}\) \(\newcommand{\uhat}{\widehat{\uvec}}\) \(\newcommand{\what}{\widehat{\wvec}}\) \(\newcommand{\Sighat}{\widehat{\Sigma}}\) \(\newcommand{\lt}{<}\) \(\newcommand{\gt}{>}\) \(\newcommand{\amp}{&}\) \(\definecolor{fillinmathshade}{gray}{0.9}\)Margin Styles
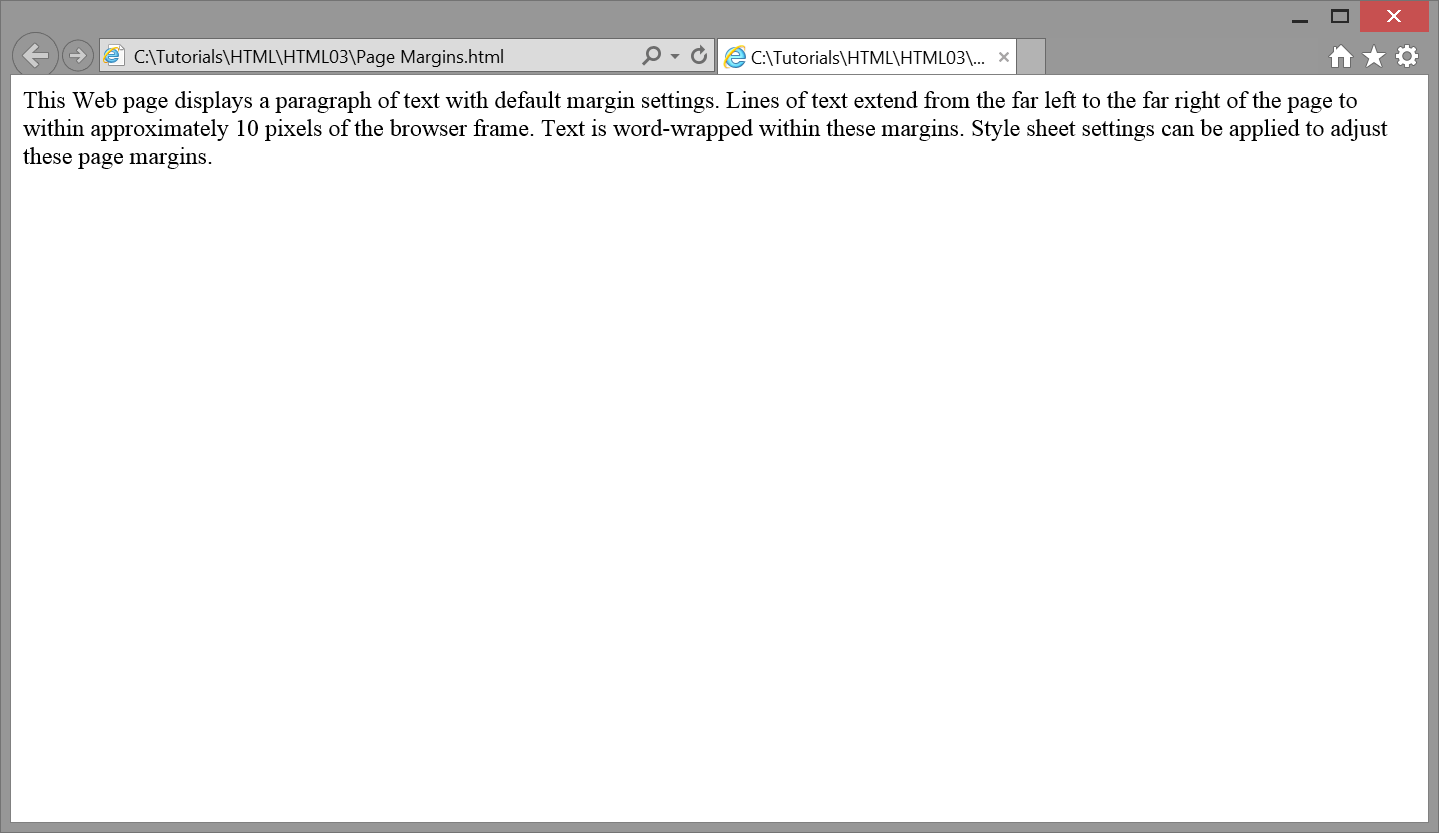
When text is displayed in the browser window it spans from border to border with about a quarter of an inch margin surrounding the text on the page. You may have noticed these margins on Web pages created earlier. They are shown in the simple single-paragraph Web page in Figure \(\PageIndex{1}\).
Margin Style Properties
There are five style properties that can be used to set margins around page elements. These properties specify the amount of space to leave between the outside edges of the element and any surrounding content. When applied to the <body> tag, they give the amount of white space that needs to be left around any content displayed on the page.

The margin property sets the same margin width around all sides of the element; the margin-top, margin-right, margin-bottom, and margin-left properties set margins individually for each of the four sides. The auto setting causes margins to revert to their default widths when overriding previous margin settings.
Measurement Values
The margin properties, like various other style properties, require a measurement value. In most cases, you are required to specify whether the measurement is in pixels (px), a percentage (%) of the width of the browser window, an em (em), or point (pt). If you do not specify the measurement type, then pixels are assumed.
Applying Margins with an In-Line Style Sheet
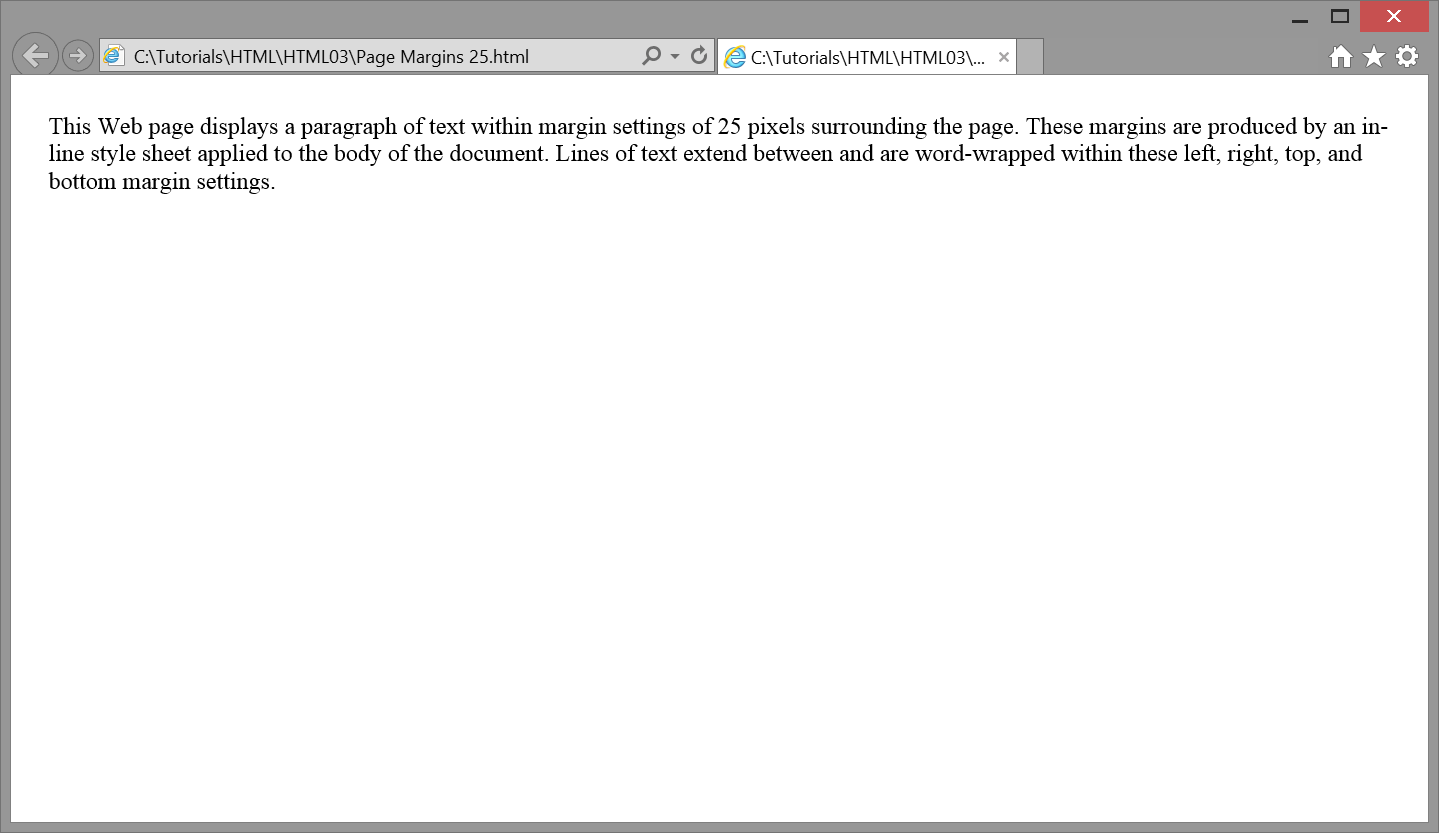
You can set margins surrounding the content on a Web page by applying a style sheet to the <body> tag. For example, the following in-line style sheet sets a 25-pixel margin around the entire page by using the margin property, and by specifying 25 pixels of white space between the contents on the page and the borders of the browser window.
    <body style="margin:25px;">

    <p> This Web page displays a paragraph of text within margin settings of
    25 pixels surrounding the page. These margins are produced by an in-line
    style sheet applied to the body of the document. Lines of text extend
    between and are word-wrapped within these left, right, top, and bottom
    margin settings.</p>

    </body>
This styling produces the page display shown in Figure \(\PageIndex{3}\). The text paragraph appears less crowded than in Figure \(\PageIndex{1}\) which makes it a more inviting read. Shortening the lines makes the text more readable as well.
Applying Margins with an Embedded Style Sheet
In the above example, the <body> tag includes an in-line style sheet to set margins for this particular page. Instead, you can code an embedded style sheet to produce the same results. The following <style> entry supplies a body selector along with a margin style property and value to apply to this tag.
<head><title>Page Margins</title><style>body {margin:25px;}</style></head><body><p>This Web page displays a paragraph of text within margin settings of 25 pixels surrounding the page. These margins are produced by an embedded style sheet applied to the body of the document. Lines of text extend between and are word-wrapped within these left, right, top, and bottom margin settings.</p></body>
The <body> tag, through the body selector, takes on the 25-pixel margin setting without having to code a style sheet inside the tag itself. Furthermore, by using an embedded style sheet, style settings are isolated within a separate section of the page which allows styles to be easily located and changed if necessary. In fact, your first instinct, should be to create an embedded style sheet adjusted to in-line or linked style sheets as situations dictate.
Applying Margins with a Linked Style Sheet
If you have a Web site with multiple pages and all pages need to share the same body margins, then a linked style sheet should be used. Place body styling in this separate document and link to it from all pages to which the style should apply.
The following code shows a Stylesheet.css document in which margin styling for the <body> tag is specified. This document appears in the same Web directory as the pages which share this style.
 Stylesheet.css

        body {margin:25px;}
Once this style sheet document has been created any Web page can apply its margin settings by linking to it. Code to adopt this linked style sheet is shown below.
<head><title>Any Page</title><linkhref="Stylesheet.css" rel="stylesheet"></head>...
Applying Individual Page Margins
In the above examples, the margin property is applied to set the same margin widths surrounding all four side of the page. Instead, you can selectively apply different widths to each of the sides by using individual margin properties. In the following embedded style sheet these different margin settings are applied to a page.
<style>body {margin-top:50px; margin-left:30px; margin-right:30px; margin-bottom:50px;}</style>
Note that the properties can appear in any order without affecting their application. Be sure that property:value pairs are connected with a colon (:) and that declarations are separated with semicolons (;).
The single margin property also provides a quick way to specify individual margins. The previous example could have been written using just the margin property in the following way
<style>body { margin: 50px 30px 50px 30px; }</style>
With this shortcut method the order of values is important. Each length corresponds to the top, right, bottom, and left margins, in that order. Providing the margin with just two values also provides a neat shortcut. The previous code can further be reduced simply to:
<style>body { margin: 50px 30px; }</style>
Here, the top and bottom margins will have a length of 50px, and the left and right margins will have a length of 30px. Again, the order matters for this shortcut to correctly work.
Vertical Margins
It was mentioned previously that multiple <br> tags can be used to increase the amount of vertical spacing on a page. Each <br> tag beyond the one used to end a line of text produces an additional blank line down the page.
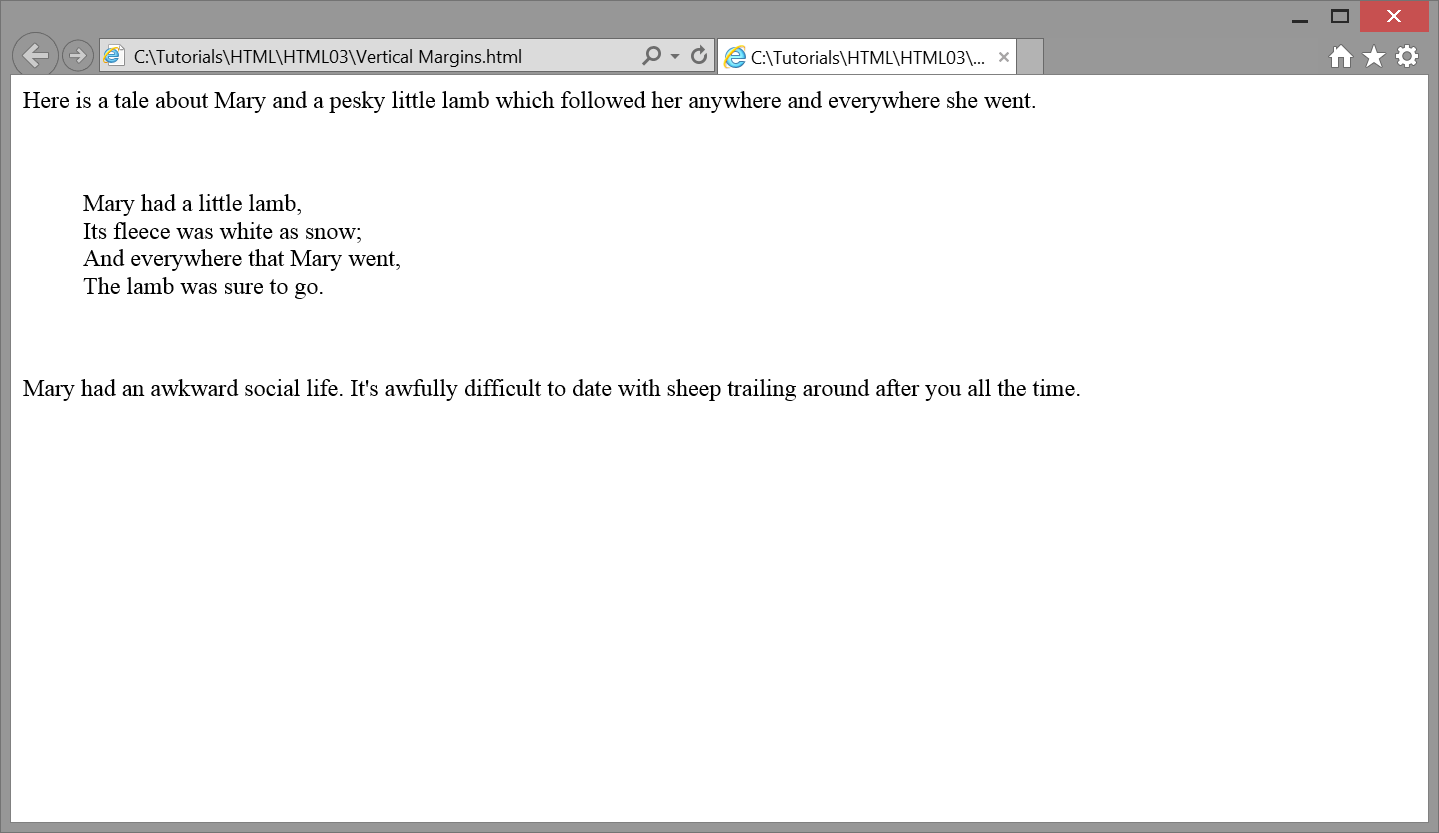
This same effect can be achieved with margin-top and margin-bottom style settings. By specifying these margin widths at the top and bottom of a text block, the given number of pixels of blank space are inserted before and after the text, and produce an effect similar to inserting blank lines. For instance, the following code inserts additional spacing before and after an indented paragraph by increasing its top and bottom margins with an in-line style sheet. The effect is the same as shown previously for a blockquoted paragraph offset with additional <br> tags. Browser output is shown in Figure \(\PageIndex{4}\).
<p>Here is a tale about Mary and a pesky little lamb which followed her anywhere and everywhere she went.</p><pstyle="margin-left:40px; margin-right:40px; margin-top:50px; margin-bottom:50px;">Mary had a little lamb,<br>Its fleece was white as snow;<br>And everywhere that Mary went,<br>The lamb was sure to go.<br></p><p>Mary had an awkward social life. It's awfully difficult to date with sheep trailing around after you all the time.</p>
While it is possible to use either multiple <br> tags or extended margin settings to produce vertical spacing, HTML5 guidelines specify that the
tag should only be used to provide line breaks among content, not simply to generate extra blank vertical space. Moreover, greater pixel precision is gained by applying margin-top and margin-bottom styles.
As you encounter additional tags throughout these tutorials, keep in mind that they can be assigned margin properties to adjust the amount of space between their contents and surrounding elements on the page. Margin settings are one of the main techniques used to reduce the crowding of content on a Web page. There will be a recurring need to apply margin properties to all manner of HTML tags.
Paragraph Margins
Margin styles are applicable to many HTML tags, not just to the <body> tag. In fact, any container tag can take on margin settings. The <p> tag is case in point. By declaring margin, margin-top, margin-right, margin-bottom, and/or margin-left style properties for this tag, a paragraph can have its margins adjusted on all sides of the text block or on each side individually.
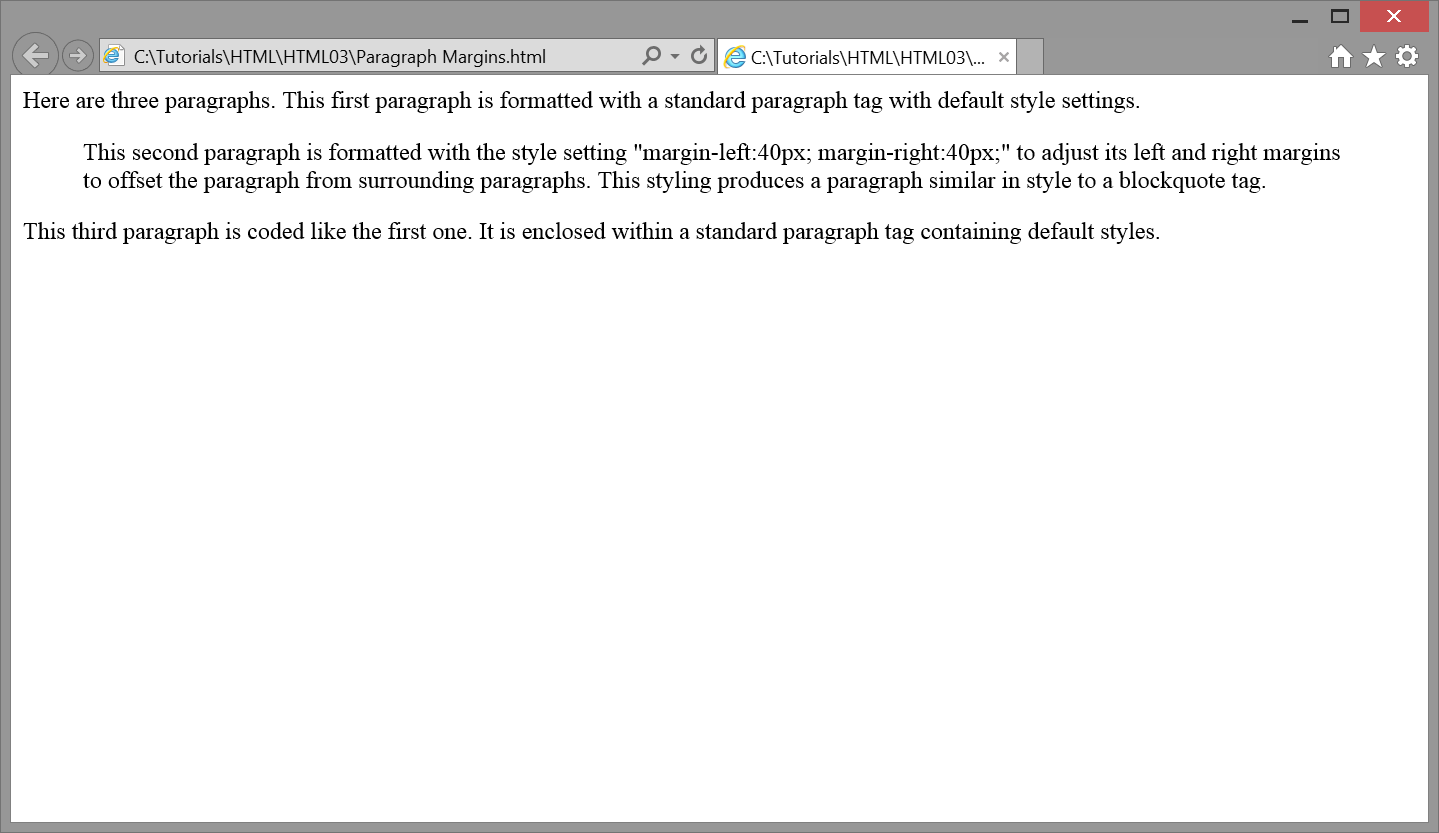
The following code displays three paragraphs, the middle one of which uses an in-line style sheet to set its left and right margins to 40 pixels.
<p>Here are three paragraphs. This first paragraph is formatted with a standard paragraph tag with default style settings.</p><pstyle="margin-left:40px; margin-right:40px;">This second paragraph is formatted with the style setting "margin-left:40px; margin-right:40px;" to adjust its left and right margins to offset the paragraph from surrounding paragraphs. This styling produces a paragraph similar in style to a blockquote tag.</p><p>This third paragraph is coded like the first one. It is enclosed within a standard paragraph tag containing default styles.</p>
Browser output of this code is shown in Figure \(\PageIndex{5}\).
An in-line style sheet is used in this example since margin settings are applicable only to the single paragraph. There is no need to define an embedded style sheet or to create a linked style sheet document since this styling is not shared across all paragraphs.