
2.9: Canvas
- Page ID
- 61308
\( \newcommand{\vecs}[1]{\overset { \scriptstyle \rightharpoonup} {\mathbf{#1}} } \)
\( \newcommand{\vecd}[1]{\overset{-\!-\!\rightharpoonup}{\vphantom{a}\smash {#1}}} \)
\( \newcommand{\id}{\mathrm{id}}\) \( \newcommand{\Span}{\mathrm{span}}\)
( \newcommand{\kernel}{\mathrm{null}\,}\) \( \newcommand{\range}{\mathrm{range}\,}\)
\( \newcommand{\RealPart}{\mathrm{Re}}\) \( \newcommand{\ImaginaryPart}{\mathrm{Im}}\)
\( \newcommand{\Argument}{\mathrm{Arg}}\) \( \newcommand{\norm}[1]{\| #1 \|}\)
\( \newcommand{\inner}[2]{\langle #1, #2 \rangle}\)
\( \newcommand{\Span}{\mathrm{span}}\)
\( \newcommand{\id}{\mathrm{id}}\)
\( \newcommand{\Span}{\mathrm{span}}\)
\( \newcommand{\kernel}{\mathrm{null}\,}\)
\( \newcommand{\range}{\mathrm{range}\,}\)
\( \newcommand{\RealPart}{\mathrm{Re}}\)
\( \newcommand{\ImaginaryPart}{\mathrm{Im}}\)
\( \newcommand{\Argument}{\mathrm{Arg}}\)
\( \newcommand{\norm}[1]{\| #1 \|}\)
\( \newcommand{\inner}[2]{\langle #1, #2 \rangle}\)
\( \newcommand{\Span}{\mathrm{span}}\) \( \newcommand{\AA}{\unicode[.8,0]{x212B}}\)
\( \newcommand{\vectorA}[1]{\vec{#1}} % arrow\)
\( \newcommand{\vectorAt}[1]{\vec{\text{#1}}} % arrow\)
\( \newcommand{\vectorB}[1]{\overset { \scriptstyle \rightharpoonup} {\mathbf{#1}} } \)
\( \newcommand{\vectorC}[1]{\textbf{#1}} \)
\( \newcommand{\vectorD}[1]{\overrightarrow{#1}} \)
\( \newcommand{\vectorDt}[1]{\overrightarrow{\text{#1}}} \)
\( \newcommand{\vectE}[1]{\overset{-\!-\!\rightharpoonup}{\vphantom{a}\smash{\mathbf {#1}}}} \)
\( \newcommand{\vecs}[1]{\overset { \scriptstyle \rightharpoonup} {\mathbf{#1}} } \)
\( \newcommand{\vecd}[1]{\overset{-\!-\!\rightharpoonup}{\vphantom{a}\smash {#1}}} \)
\(\newcommand{\avec}{\mathbf a}\) \(\newcommand{\bvec}{\mathbf b}\) \(\newcommand{\cvec}{\mathbf c}\) \(\newcommand{\dvec}{\mathbf d}\) \(\newcommand{\dtil}{\widetilde{\mathbf d}}\) \(\newcommand{\evec}{\mathbf e}\) \(\newcommand{\fvec}{\mathbf f}\) \(\newcommand{\nvec}{\mathbf n}\) \(\newcommand{\pvec}{\mathbf p}\) \(\newcommand{\qvec}{\mathbf q}\) \(\newcommand{\svec}{\mathbf s}\) \(\newcommand{\tvec}{\mathbf t}\) \(\newcommand{\uvec}{\mathbf u}\) \(\newcommand{\vvec}{\mathbf v}\) \(\newcommand{\wvec}{\mathbf w}\) \(\newcommand{\xvec}{\mathbf x}\) \(\newcommand{\yvec}{\mathbf y}\) \(\newcommand{\zvec}{\mathbf z}\) \(\newcommand{\rvec}{\mathbf r}\) \(\newcommand{\mvec}{\mathbf m}\) \(\newcommand{\zerovec}{\mathbf 0}\) \(\newcommand{\onevec}{\mathbf 1}\) \(\newcommand{\real}{\mathbb R}\) \(\newcommand{\twovec}[2]{\left[\begin{array}{r}#1 \\ #2 \end{array}\right]}\) \(\newcommand{\ctwovec}[2]{\left[\begin{array}{c}#1 \\ #2 \end{array}\right]}\) \(\newcommand{\threevec}[3]{\left[\begin{array}{r}#1 \\ #2 \\ #3 \end{array}\right]}\) \(\newcommand{\cthreevec}[3]{\left[\begin{array}{c}#1 \\ #2 \\ #3 \end{array}\right]}\) \(\newcommand{\fourvec}[4]{\left[\begin{array}{r}#1 \\ #2 \\ #3 \\ #4 \end{array}\right]}\) \(\newcommand{\cfourvec}[4]{\left[\begin{array}{c}#1 \\ #2 \\ #3 \\ #4 \end{array}\right]}\) \(\newcommand{\fivevec}[5]{\left[\begin{array}{r}#1 \\ #2 \\ #3 \\ #4 \\ #5 \\ \end{array}\right]}\) \(\newcommand{\cfivevec}[5]{\left[\begin{array}{c}#1 \\ #2 \\ #3 \\ #4 \\ #5 \\ \end{array}\right]}\) \(\newcommand{\mattwo}[4]{\left[\begin{array}{rr}#1 \amp #2 \\ #3 \amp #4 \\ \end{array}\right]}\) \(\newcommand{\laspan}[1]{\text{Span}\{#1\}}\) \(\newcommand{\bcal}{\cal B}\) \(\newcommand{\ccal}{\cal C}\) \(\newcommand{\scal}{\cal S}\) \(\newcommand{\wcal}{\cal W}\) \(\newcommand{\ecal}{\cal E}\) \(\newcommand{\coords}[2]{\left\{#1\right\}_{#2}}\) \(\newcommand{\gray}[1]{\color{gray}{#1}}\) \(\newcommand{\lgray}[1]{\color{lightgray}{#1}}\) \(\newcommand{\rank}{\operatorname{rank}}\) \(\newcommand{\row}{\text{Row}}\) \(\newcommand{\col}{\text{Col}}\) \(\renewcommand{\row}{\text{Row}}\) \(\newcommand{\nul}{\text{Nul}}\) \(\newcommand{\var}{\text{Var}}\) \(\newcommand{\corr}{\text{corr}}\) \(\newcommand{\len}[1]{\left|#1\right|}\) \(\newcommand{\bbar}{\overline{\bvec}}\) \(\newcommand{\bhat}{\widehat{\bvec}}\) \(\newcommand{\bperp}{\bvec^\perp}\) \(\newcommand{\xhat}{\widehat{\xvec}}\) \(\newcommand{\vhat}{\widehat{\vvec}}\) \(\newcommand{\uhat}{\widehat{\uvec}}\) \(\newcommand{\what}{\widehat{\wvec}}\) \(\newcommand{\Sighat}{\widehat{\Sigma}}\) \(\newcommand{\lt}{<}\) \(\newcommand{\gt}{>}\) \(\newcommand{\amp}{&}\) \(\definecolor{fillinmathshade}{gray}{0.9}\)The canvas element (new as of HTML5) allows us to approach pages with greater control by drawing and creating SVG-style graphics on the page in real time with JavaScript, and giving us the ability to animate and control the motion of our elements. With these new abilities, it is now possible to create browser games and highly interactive pages without the use of flash, additional components, or even pre-existing images (not that this would be a best approach in every situation).
Terminology and integrated functions are focused around the concept of art and media graphics, including functions like stroke() and fill() among others, that expedite your ability to create an image on the screen without a verbose background in graphic arts and mathematical modeling.
Each of the items we create can become an object of its own, and can be grouped with multiple layers or elements as one item. Supporting browsers can understand an object’s dimensions and relationship to other elements, bringing native drag-and-drop into play. Page elements that support drag-and-drop can add the draggable attribute to their declaration.
Calling this element a canvas is intentional, and conveys an accurate portrayal of how to treat it. When we create a set of canvas tags and set our width and height, we have effectively “hung” a blank painting on the “wall” of our web page. In our examples below, we will be using a number of values to determine where things we “paint” on the canvas will be.
This is done by using value pairs, or X-Y coordinates. The top-most left-hand corner of the canvas is always (0, 0)—0 pixels to the right, 0 pixels down. This is different from a graph where 0, 0 is in the middle of the page. Our values for X and Y will move our drawing point to the right and down as they grow larger.
In our first example below our canvas size is 300x300, which means the bottom-most right-hand point is (300, 300). Any values large than this, or points with negative values, will move part or all of our drawing off of our canvas.
Rectangles
We will get right into canvas, since it is a visual process, and can be a lot of fun. To begin, we need to create a canvas element on our page:
- <canvas height="300" width="300"> </canvas>
While our canvas is still empty what we have done is allocated a space (just like sizing a div) to declare what part of the page belongs to our div. The width and height tags we provided are required from the start, and since we have not defined an offset or placed the canvas in another container, it will start from the top left corner of our page, again just like a div.
The act of drawing on our canvas is a several-step process. We have to declare how we want our element to appear (for example the fillStyle or strokeStyle attribute), where we want it to start from, and what type of line or shape we intend to create (for example, fillRect or strokeTriangle).
When we declare a shape, we need to convey its size and location. For a rectangle, we do this by setting its starting location (top left corner) as X and Y values, and then by adding its width and height. To add a solid rectangle to our canvas, we will have to add some JavaScript to our page. Since we have not reached JavaScript yet in this text, do not worry if you do not understand every little bit—we will get there. For now, focus on understanding which position of the arguments is used for different settings.
In the header of our page, we need to add the following JavaScript code, identifying what element we want it to affect, and what we want the drawing to be:
- <!DOCTYPE html>
- <html>
- <body>
- <canvas id="canvas" width="300" height="300" style="border: 1px solid #c3c3c3;">
- Oh no! This browser does not support HTML5 :(
- </canvas>
- <script>
- var canvas=document.getElementById("canvas");
- var canvas1=canvas.getContext("2d");
- canvas1.fillStyle="#FF0000";
- canvas1.fillRect(50, 50, 50, 50);
- </script>
- </body>
- </html>
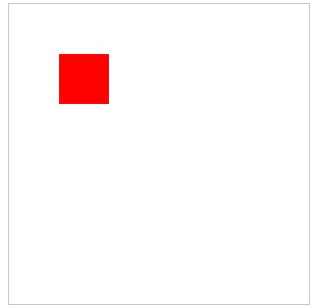
Saving and refreshing our screen should now give you a single lonely rectangle set a little inside the top left corner of your page. You may be wondering about the “Oh no!” line of our example. When our page loads, the “Oh no!” content is placed on our page. When our canvas layers are rendered, this content is then covered up. If HTML5 is not supported (or JavaScript is disabled) our canvas is not drawn, leaving the original text which we can use to tell the user something is wrong. In our fill style declaration we used a color reference as a hex value. We can also use a standard color word like red, or use a function call that takes a red, green, blue, and opacity value set to generate a color. In our fillRect declaration we defined the starting position from the left and top, as well as its width and height, respectively as fillRect(left, top, width, height). In our initial example, all values were 50. Let us add a second rectangle that is wider than it is tall, and move it much further down our page:
- <!DOCTYPE html>
- <html>
- <body>
- <canvas id="canvas" width="300" height="300" style="border: 1px solid #c3c3c3;">
- Oh no! This browser does not support HTML5 :(
- </canvas>
- <script>
- var canvas=document.getElementById("canvas");
- var canvas1=canvas.getContext("2d");
- canvas1.fillStyle="#FF0000";
- canvas1.fillRect(50, 50, 50, 50);
- canvas1.fillStyle= "rgba(0, 0, 50, 100)";
- canvas1.fillRect(50, 200, 100, 50);
- </script>
- </body>
- </html>
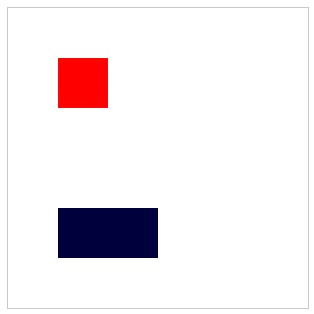
You will notice that even though we now have two blocks, we do not need to change the names we used when declaring our second rectangle from our first. This is because we are setting values, then calling a function to draw the element, and are not storing the values in our script as objects in our JavaScript code.
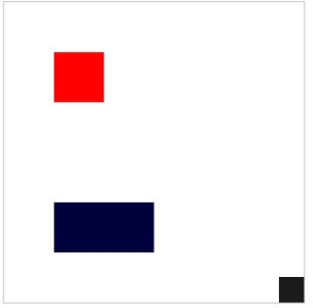
Keep in mind our drawings can be declared in a manner that draws them outside or extending beyond the confines of our canvas. They will technically be drawn, however the canvas will not expand to meet the needs of your drawing. To see this in action, we can add one more rectangle the same size as our first, but place it so it overdraws our canvas, so we only see a portion of it:
- <!DOCTYPE html>
- <html>
- <body>
- <canvas id="canvas" width="300" height="300" style="border: 1px solid #c3c3c3;">
- Oh no! This browser does not support HTML5 :(
- </canvas>
- <script>
- var canvas=document.getElementById("canvas");
- var canvas1=canvas.getContext("2d");
- canvas1.fillStyle="#FF0000";
- canvas1.fillRect(50, 50, 50, 50);
- canvas1.fillStyle= "rgba(0, 0, 50, 100)";
- canvas1.fillRect(50, 200, 100, 50);
- canvas1.fillStyle = "rgba(20, 20, 20, 20)";
- canvas1.fillRect(275, 275, 50, 50);
- </script>
- </body>
- </html>
Additional Notes
Keep in mind that JavaScript, which we are getting a sneak preview of, is case sensitive. This means Canvas1 is considered different than canvas1!
Even though this last rectangle is still 50 by 50, we only see the 25x25 of it that fits inside our canvas dimensions. Now that we have played with rectangles, we will replace them with triangles. We will also just give them borders without a fill color. To do this, we will define the line segments that make up our triangle, and use strokeStyle() instead of fillStroke():
Triangles
- <!DOCTYPE html>
- <html>
- <body>
- <canvas id="canvas" width="300" height="300" style="border:1px solid #c3c3c3;"> Oh no! This browser does not support HTML5 :(
- </canvas>
- <script>
- var canvas=document.getElementById("canvas");
- var canvas1=canvas.getContext("2d");
- canvas1.beginPath(); //declare the beginning of settings for our line
- canvas1.strokeStyle = "rgba(50, 0, 0, 0.5)";
- canvas1.moveTo(150,150); // set the starting point of our "pen" to the middle
- canvas1.lineTo(150,200); // move our "pen" down 50 pixels, drawing a line
- canvas1.lineTo(200,200); // move our "pen" 50 pixels to the right
- canvas1.closePath(); // Draw a direct line back to our starting point
- canvas1.stroke(); // Visually place the defined line on the page
- </script>
- </body>
- </html>
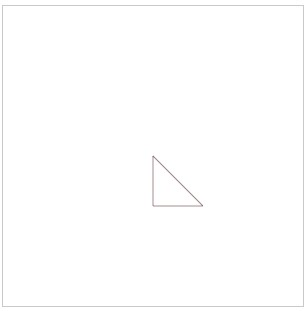
Saving and refreshing should now remove the rectangles we drew earlier and replace them with a right angle triangle positioned with the right angle in the middle of the canvas. By adjusting our X and Y values in moveTo and lineTo variables, we can move our triangle around the page. We will change just one point (our starting point) and see how different our triangle looks:
- <!DOCTYPE html>
- <html>
- <body>
- <canvas id="canvas" width="300" height="300" style="border: 1px solid #c3c3c3;"> Oh no! This browser does not support HTML5 :(
- </canvas>
- <script>
- var canvas=document.getElementById("canvas");
- var canvas1=canvas.getContext("2d");
- canvas1.beginPath(); //declare the beginning of settings for our line
- canvas1.strokeStyle = "rgba(50, 0, 0, 0.5)";
- canvas1.moveTo(75,150); // set the starting point of our "pen" to the middle
- canvas1.lineTo(150,200); // move our "pen" down 50 pixels, drawing a line
- canvas1.lineTo(200,200); // move our "pen" 50 pixels to the right
- canvas1.closePath(); // Draw a direct line back to our starting point
- canvas1.stroke(); // Visually place the defined line on the page
- </script>
- </body>
- </html>

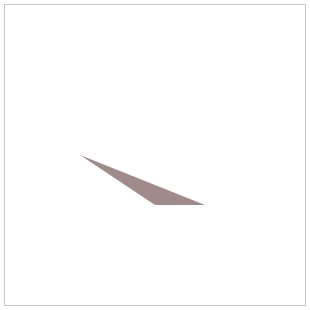
To convert our outlined triangle to a filled, solid object we just need to convert our stroke settings back to fill:
- <html>
- <body>
- <canvas id="canvas" width="300" height="300" style="border: 1px solid #c3c3c3;"> Oh no! This browser does not support HTML5 :(
- </canvas>
- <script>
- var canvas=document.getElementById("canvas");
- var canvas1=canvas.getContext("2d");
- canvas1.beginPath(); //declare the beginning of settings for our line
- canvas1.fillStyle = "rgba(50, 0, 0, 0.5)";
- canvas1.moveTo(75,150); // set the starting point of our "pen" to the middle
- canvas1.lineTo(150,200); // move our "pen" down 50 pixels, drawing a line
- canvas1.lineTo(200,200); // move our "pen" 50 pixels to the right
- canvas1.closePath(); // Draw a direct line back to our starting point
- canvas1.fill(); // Visually place the defined line on the page
- </script>
- </body>
- </html>
We can move beyond straight lines in order to draw other shapes by using Bezier curves, quadratic curves, and arcs. Each of these allow us to define different points on our lines and to curve our line between those points. For now, we will look at Bezier as an example of how to approach multi-point curves. Bezier lines allow for two control points as opposed to the one allowed in quadratic curve, so the programmatic difference is essentially just one less point defined for a quadratic than a Bezier (limiting the shape your line can take).
Bezier Curve
- <html>
- <body>
- <canvas id="canvas" width="300" height="300" style="border: 1px solid #c3c3c3;"> Oh no! This browser does not support HTML5 :(
- </canvas>
- <script>
- context.beginPath();
- context.moveTo(10, 130);
- context.bezierCurveTo(0, 10, 290, 10, 290, 290);
- context.lineWidth = 10;
- context.strokeStyle = black;
- context.stroke();
- </script>
- </body>
- </html>
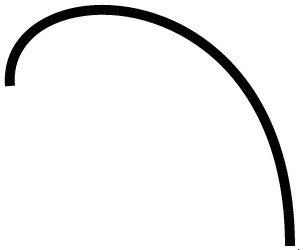 Figure \(\PageIndex{1}\): Copy and Paste Caption here. (Copyright; author via source)
By setting a moveTo point, we are starting our curve from that point just as with a regular line. From here, our Bezier function call takes three sets of points, our two control points, and end point. As a challenge, try adjusting your Bezier points to turn this example into a drop, or marker style, symbol.
Drawn Text
We can even draw text on the screen. While this might seem redundant as we have done that since we began this section, drawing text on a canvas can help us complete logos or draw letters without specifying every line needed to create the letter itself. This means the text becomes part of the canvas and cannot be copy/pasted. To create text, we simply need to define the style, string, and starting location. Replacing our earlier examples, our new canvas1 definition turns into:
- <script>
- var canvas=document.getElementById("canvas");
- var canvas1=canvas.getContext("2d");
- </script>
The benefit of creating text as a layer on a canvas instead of styling it with CSS allows us additional mechanisms to manipulate our words.
With this set of techniques, we can now recreate icons and logos without needing actual image files, and can scale them to fit as our page size and layout changes. This also makes it more difficult for your drawn images to be “borrowed.” As there is no image file to save, it becomes more difficult (though not impossible) for anyone trying to use your creations. Let us add text to this canvas by setting up a splash of color for our text, then defining our font, text and start location:
- var gradient=ctx.createLinearGradient(0,0,c.width,0);
- gradient.addColorStop("0","red");
- gradient.addColorStop("0.5","yellow");
- gradient.addColorStop("1.0","blue");
- ctx.fillStyle=gradient;
- ctx.fillText("Let's see some color!",10,90);+
Learn more
Keywords, search terms: Canvas, css graphics
See what Canvas can do! http://net.tutsplus.com/articles/web-roundups/21-ridiculously-impressive-html5-canvas-experiments/
The full specifications http://www.w3.org/TR/2009/WD-html5-20090825/the-canvas-element.html