
12: Schedules and Project Phasing
- Page ID
- 88772

12.1 CREATE A SCHEDULE
- Click the View tab above the Ribbon
- Click the Schedule icon
 drop-down arrow
 - Click the Schedule/Quantities icon

- In the New Schedule window change the following parameters, see Figure 12.1
- In the Filter drop-down list, only check the Architecture option
- Under Category select Doors
- Name it “Door Schedule”
- Click OK

Figure 12.1 New Schedule window with Door category chosen
- In the Schedule Properties window click the Fields tab
- Select the following available fields and add them to the schedule fields in the following order using the Add Parameters icon
 , see Figure 12.2.
- Type, Type Mark, Width, Height
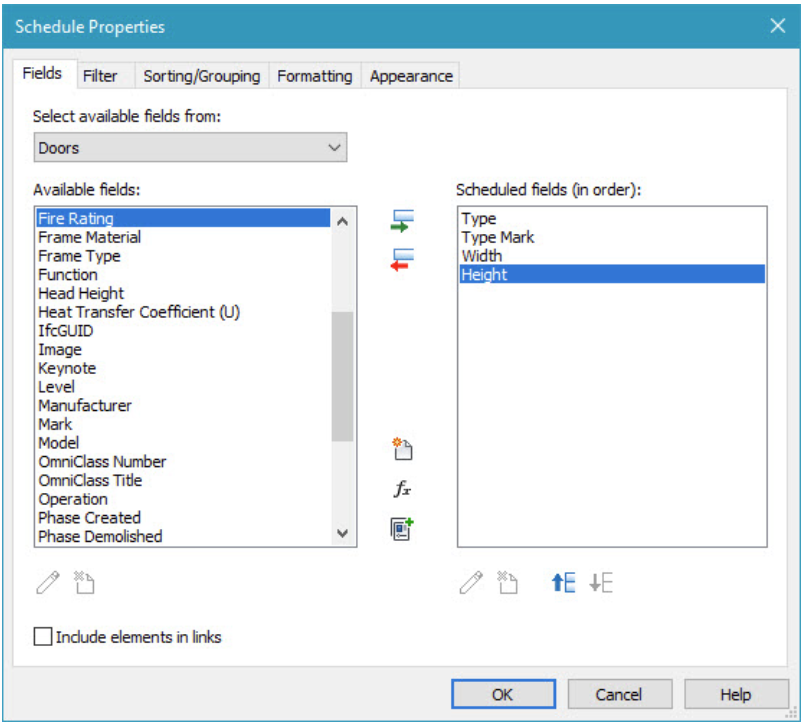
Figure 12.2 Schedule Properties window with fields selected
- Type, Type Mark, Width, Height
- In the Sorting/Group tab, sort by Type and uncheck the option “Itemize every instance”, see Figure 12.3

Figure 12.3 Sorting/Grouping tab in the Schedule Properties window- In the Formatting tab, change the Type Mark alignment to Center, see Figure 12.4
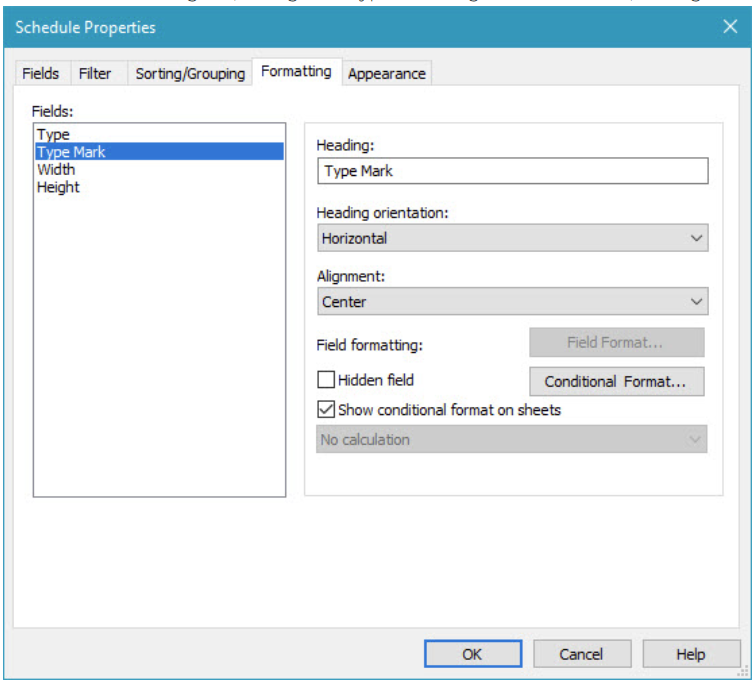
Figure 12.4 Formatting tab in the Schedule Properties window- In the Appearance tab check the Outline box and use the drop-down menu to choose Medium Lines, see Figure 12.5
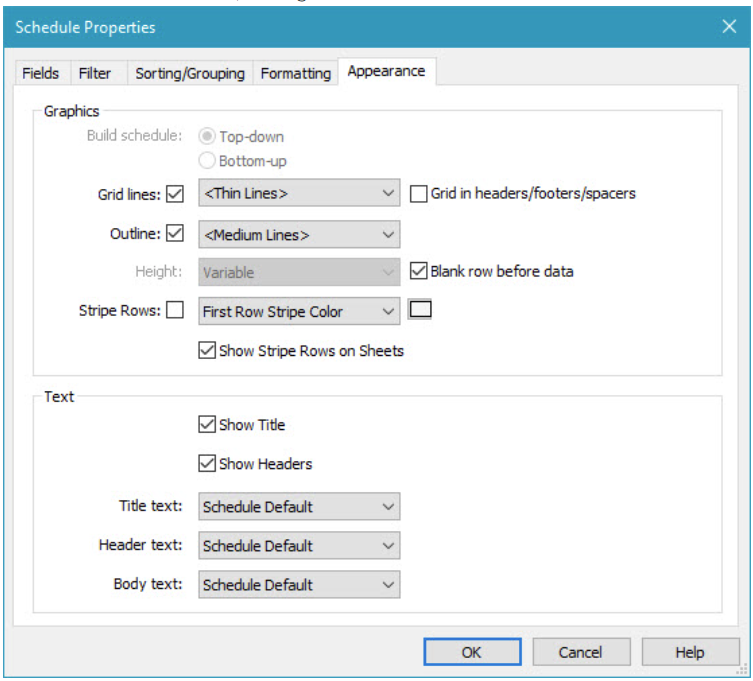 Figure 12.5 Appearance tab in the Schedule Properties window
- Click OK
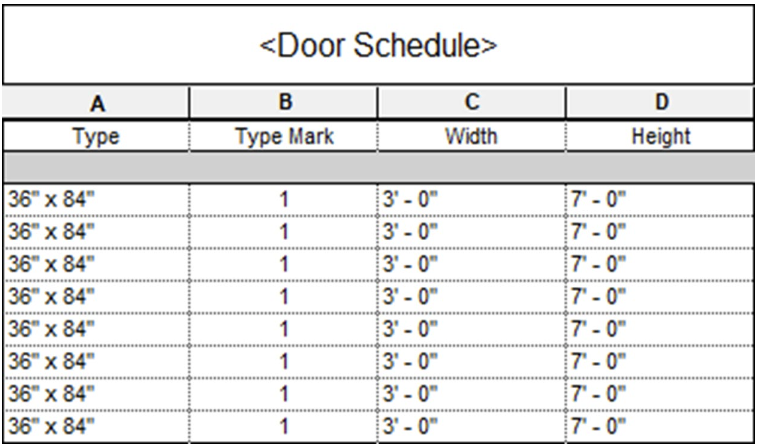
Figure 12.6 Completed Door Schedule
12.2 PROJECT PHASING
For this section consider that an elementary school will design an addition to accommodate an increased number of student enrollment. Revit can classify parts of the elementary school renovation project in phases such as New, Existing, Demolished, or Temporary.
New Construction consists of all elements that are added to the school such as a new foundation, walls, floors, windows, and more.
Existing Construction consists of all elements from the original building footprint.
Demolishing Construction classifies anything that will be taken away from the project, such as the exterior wall torn down for the new construction to attach to.
Temporary Construction consists of all elements used during the construction such as fences, scaffolding or braces.
Create a Phase
- Click the Manage tab
- Under the Phasing Panel, click the Phases icon

- In the Phasing window select, the number to the left of the option Existing
- Then select the After button on the right
TIP
- Click the Name Phase 1 and rename it Demolish, see Figure 12.7
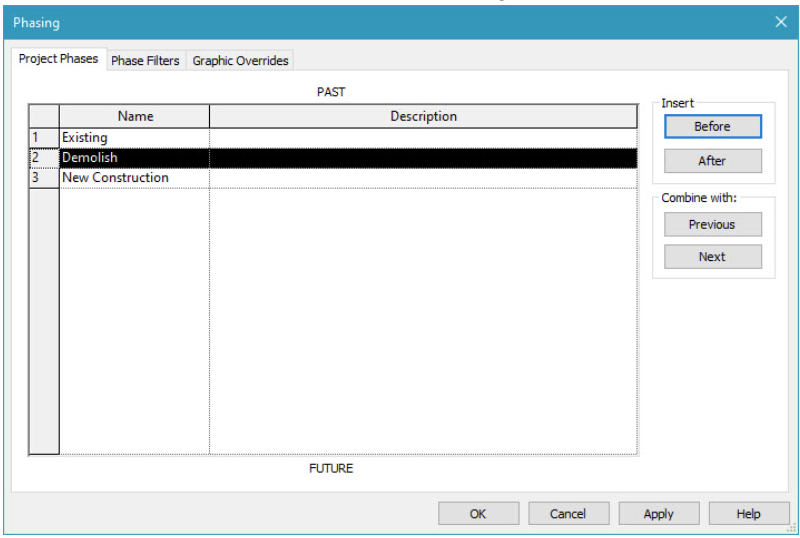
Figure 12.7 Project Phasing options in the Phasing window - Click on the Phase Filters tab at the top of the Phasing window
- Click the New button along the bottom
- Rename the new filter Demo Only
- Change the following parameters, see Figure 12.8
- New to Overridden
- Existing to Not Displayed
- Demolished to Overridden
- Temporary to Not Displayed
- Click Apply and OK
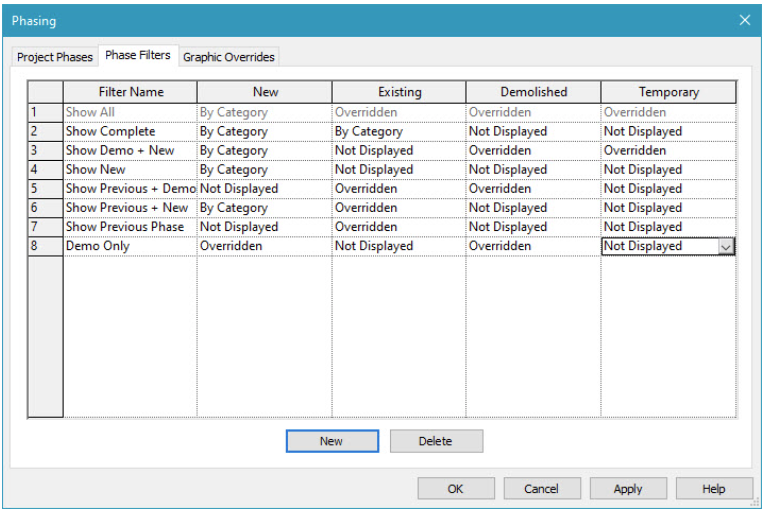
Figure 12.8 Phase filters in the Phasing window
- In any view, select the element
- In the Properties Palette scroll to the bottom and use the drop-down menu to change the Phase to Demolish
- Select Apply
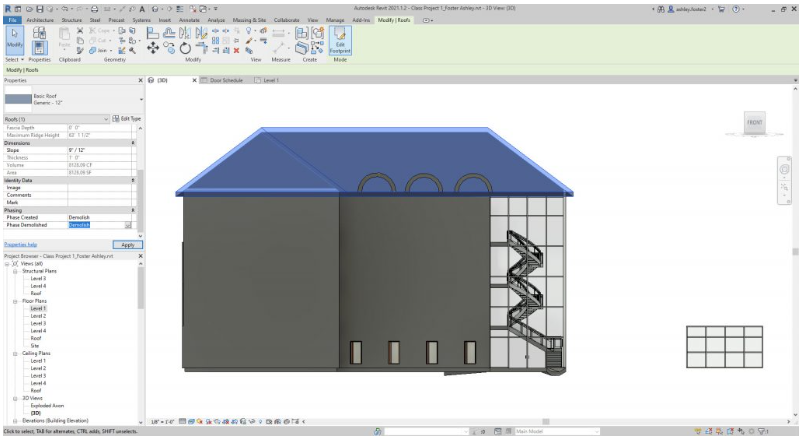
Figure 12.9 Phasing change applied to an element in the project