
13: Drawing Sets and Construction Documents


- Last updated
- Oct 19, 2022
- Save as PDF

( \newcommand{\kernel}{\mathrm{null}\,}\)
13.1 CREATE SHEETS AND LISTS
Create a sheet
- In the View tab, click the Sheet icon
- Click the Load button
- Navigate to the Title block folder and open it
- Select the 11X17 Horizontal option
- Click Open
- In the New Sheet window, click OK
- To modify the text simply hover over the text until the text box appears and double-click to access it
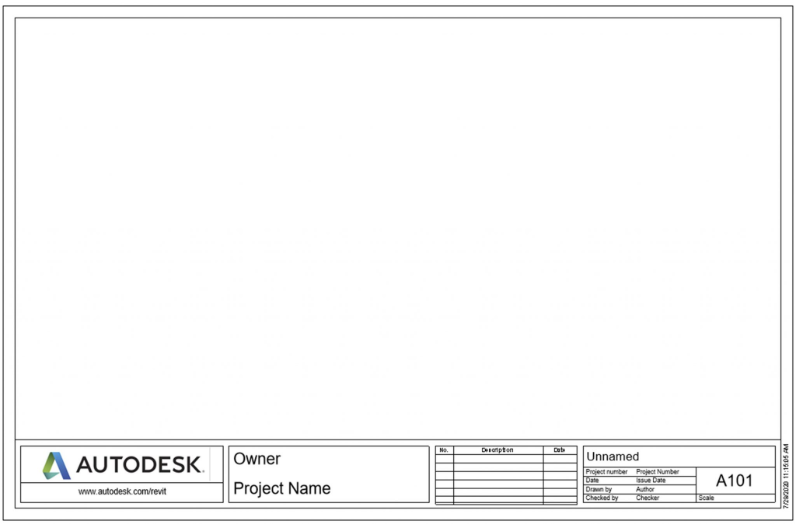
Figure 13.1 Created sheet with default horizontal Autodesk title block templateTIP
Edit a title block by selecting the edge of the paper and then click the Edit Family icon
 then Save As a new file. Or create a new title block through a Family template
Create a sheet list
- In the View tab, click the Schedules
 drop-down arrow
 - Click the Sheet List icon

- In the available fields select the following options (in order) and add them to the Scheduled Fields
- Sheet Number, Sheet Name, Sheet Issue Date, Designed By
- Under the Sorting/Grouping tab choose to Sort by Sheet Number
- Under the Appearance tab, enable the Outline by checking the box and choose Medium Lines
- Click OK
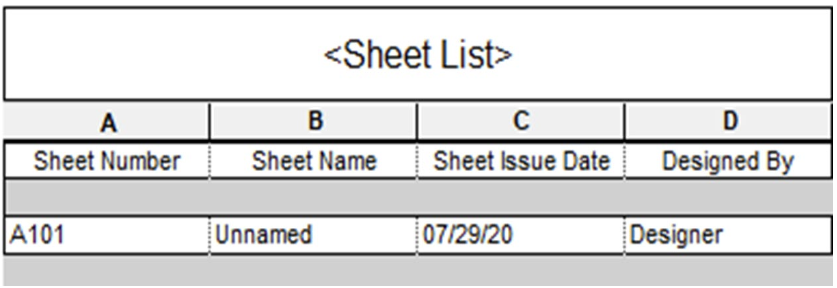
Figure 13.2 Sheet List
TIP
The Sheet List will update as more sheets are created
13.2 SETTING UP SHEETS
- Open the A101 – Unnamed sheet
- On the Canvas, double-click the Unnamed text box and change it to First Floor Plan
- Click on the View tab
- On the Sheet Composition panel, click the View icon

- In the Views window, click the Floor Plan: Level 1 option
- Click the Add View to Sheet
- Click on the Canvas to place the view
- Double-click on the placed view (or viewport) to access the floor plan
- On the Option View Bar change the scale to 1/16” = 1’
- In the Properties Palette under the Extents section, Check the box next to Crop View and Crop Region Visible
- Adjust the extents as shown in Figure 13.3 then click the green
 checkmark.
TIP
What area is chosen by the crop view extents is what will be shown when the view is added to a sheet. The view title will be justified to the left extent, therefore, to work efficiently, pull the extents in as close to the drawing as possible to avoid editing in the sheets.
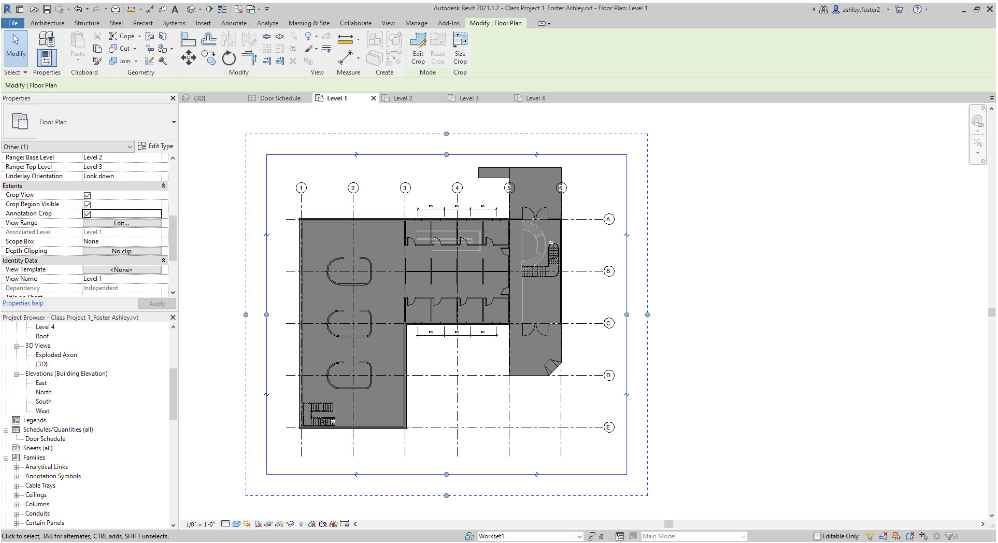
Figure 13.3 Adjusting the Crop view in plan view - Move the views title bar by highlighting its elements the use the Move tool to place it under the floor plan
- To modify individual elements of the title bar click them to access their extents
13.3 ADD SCHEDULES TO A SHEET
- On the A101 – First Floor Plan view, go to the Project Browser
- Expand the Schedules/Quantities
- Click and drag the Room Schedule to the canvas
- Click to place it in the top right corner of the sheet as shown in Figure 13.4
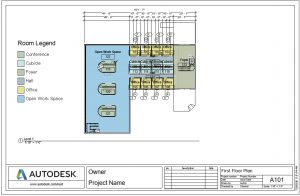
Figure 13.4 Schedule added to sheet A101